Files for a 3D printed replica of the Mini UZI used by the Skinny Man in the 2017 live action movie Ghost in The Shell.
Also see Assembly Instructions
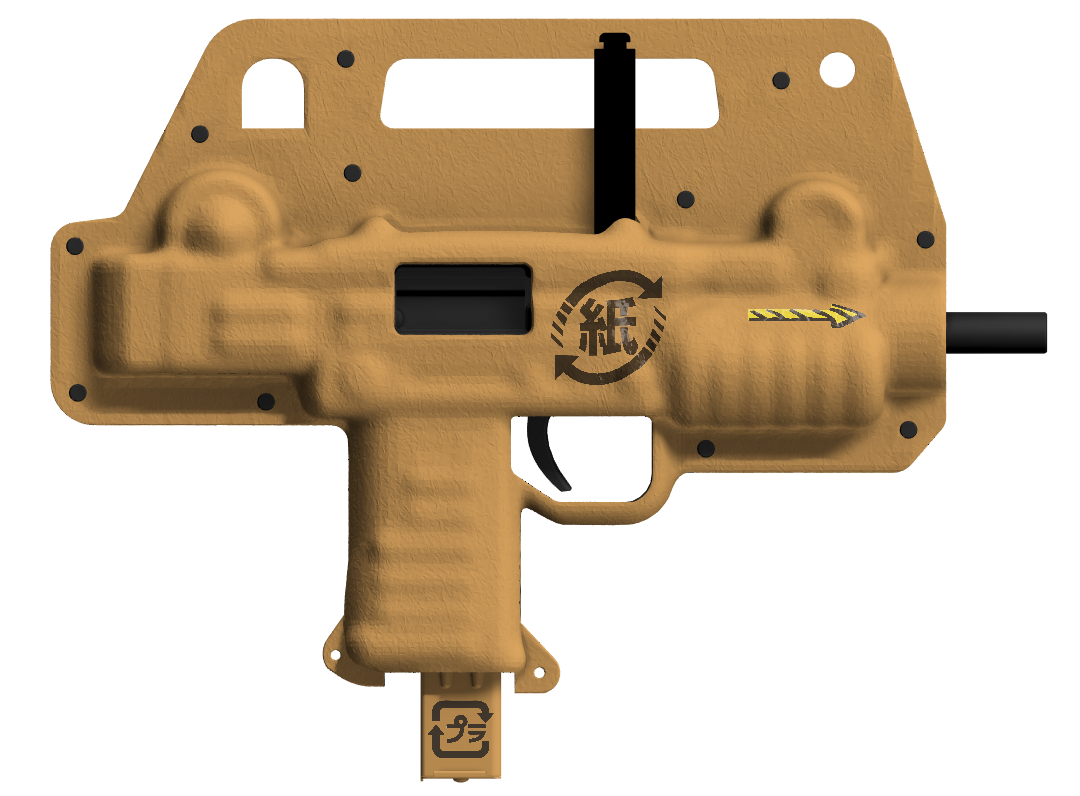
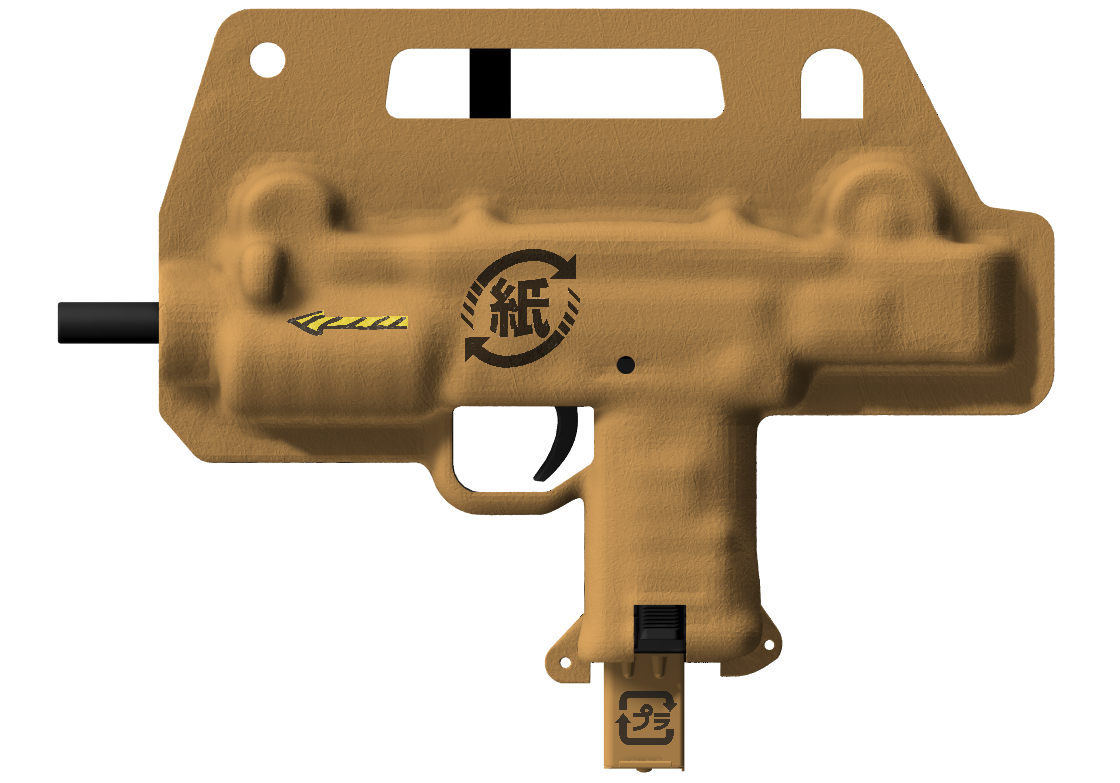
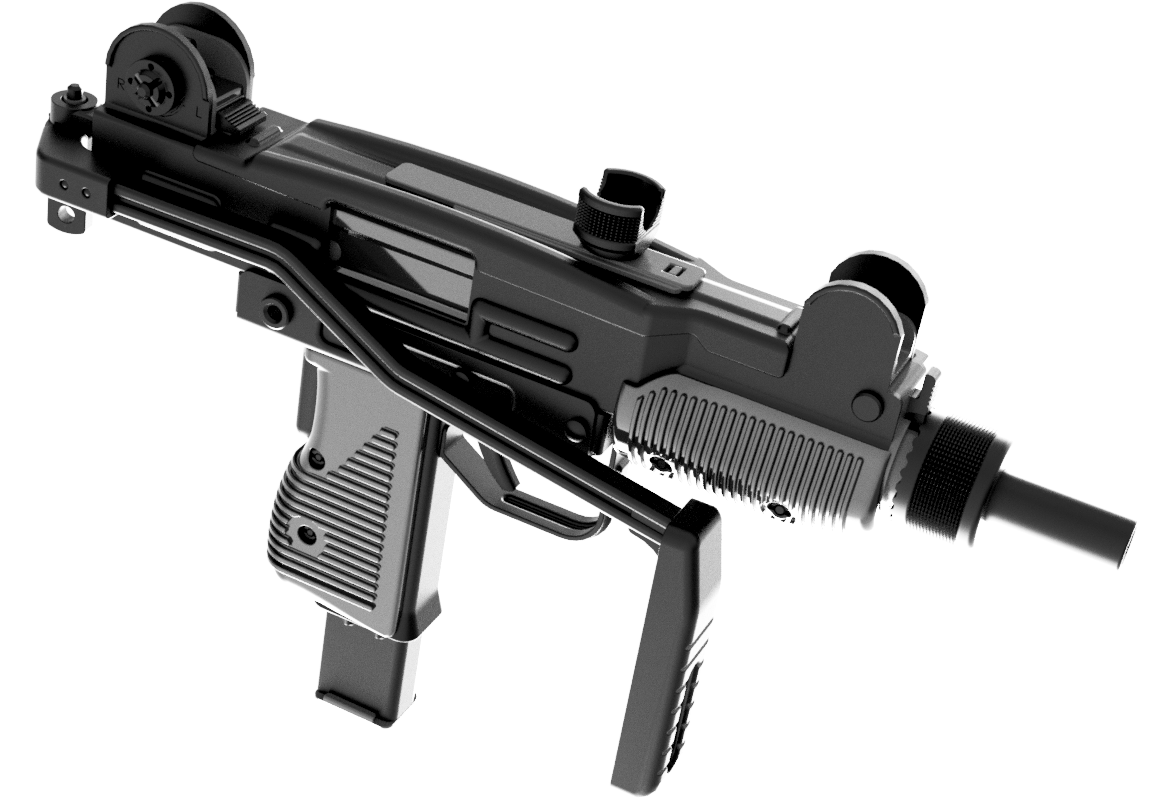
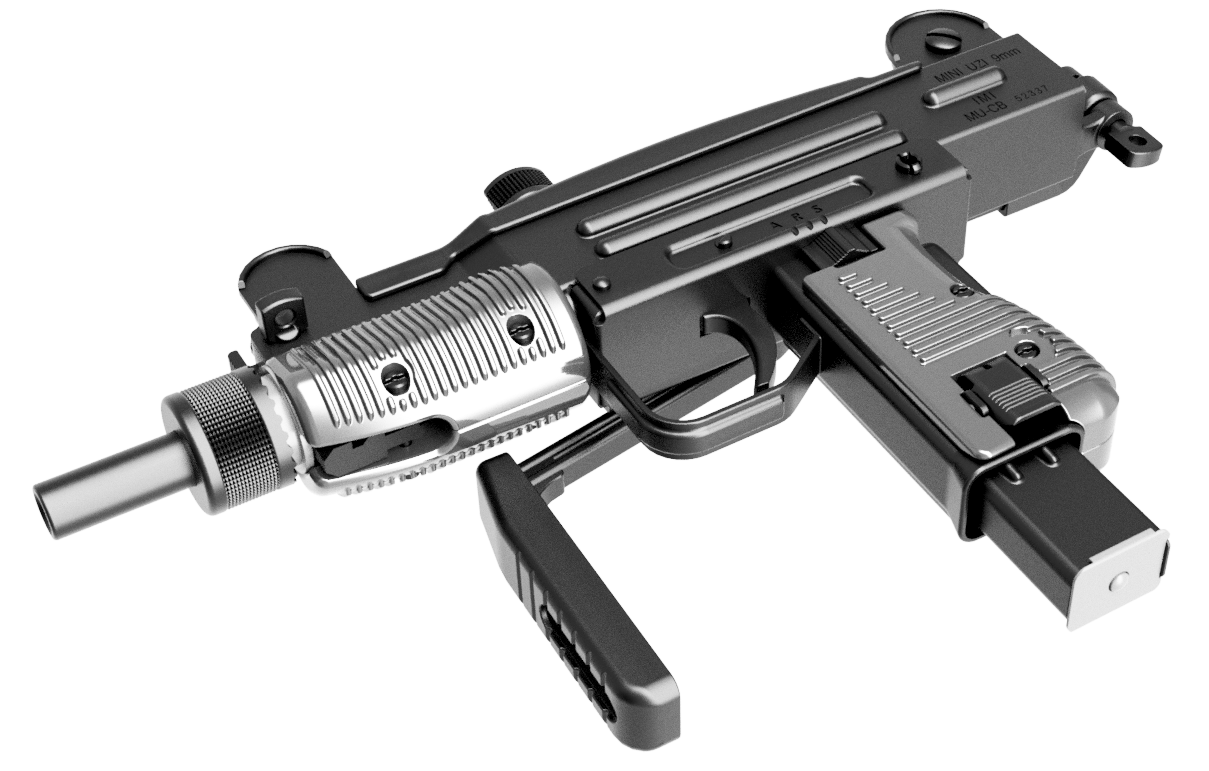
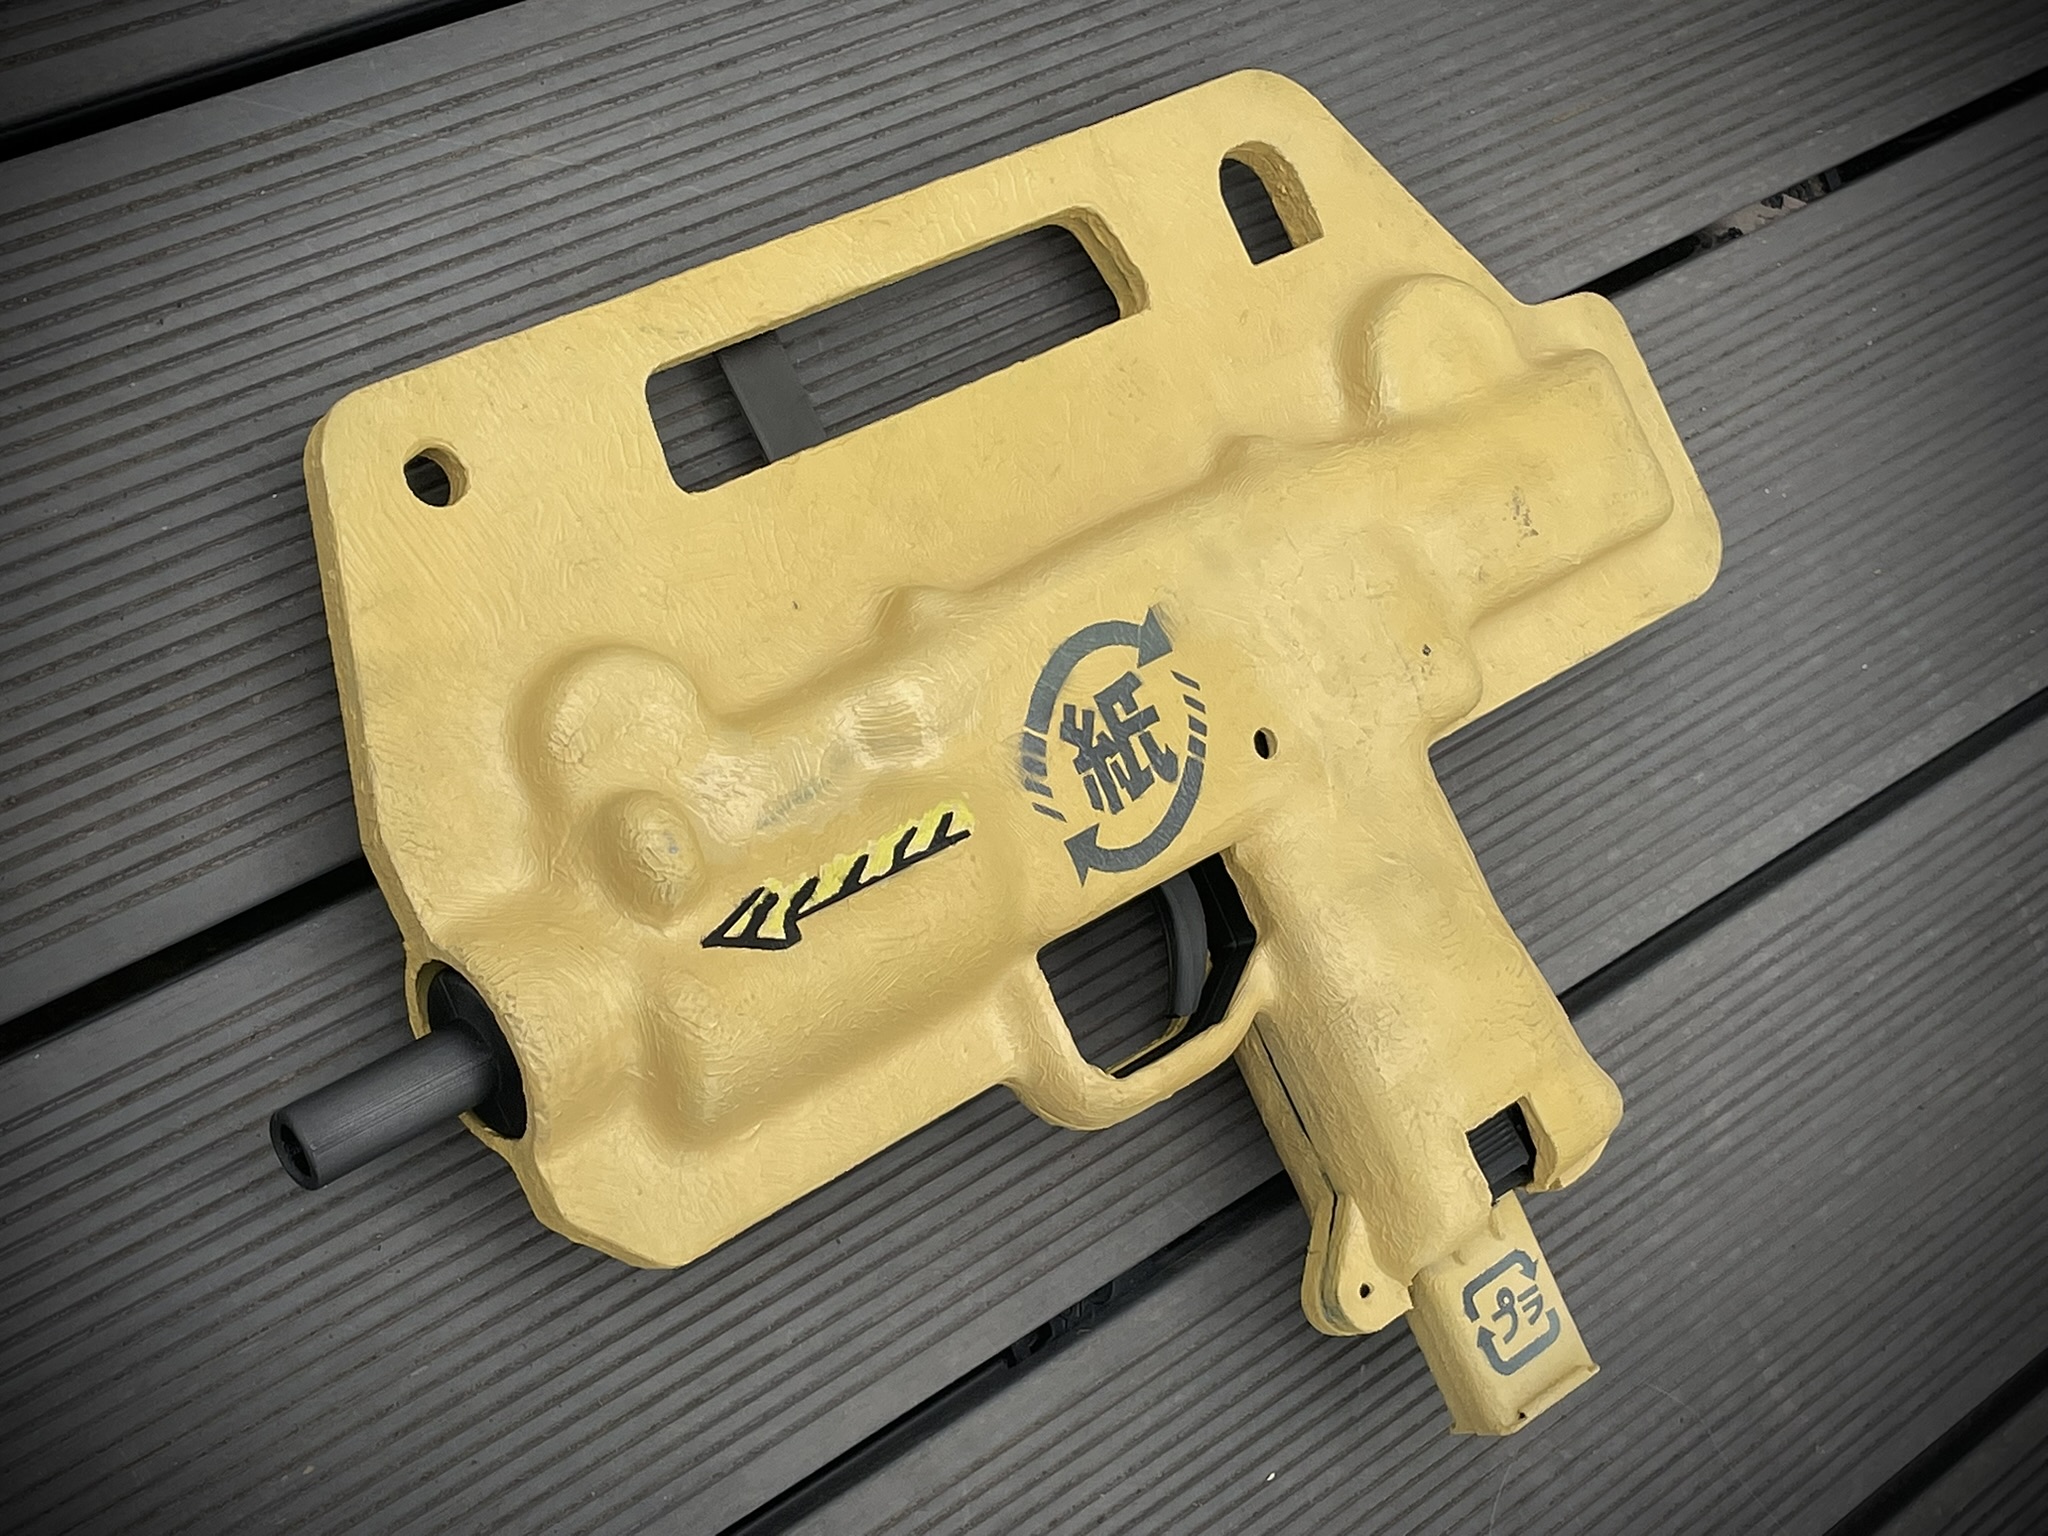
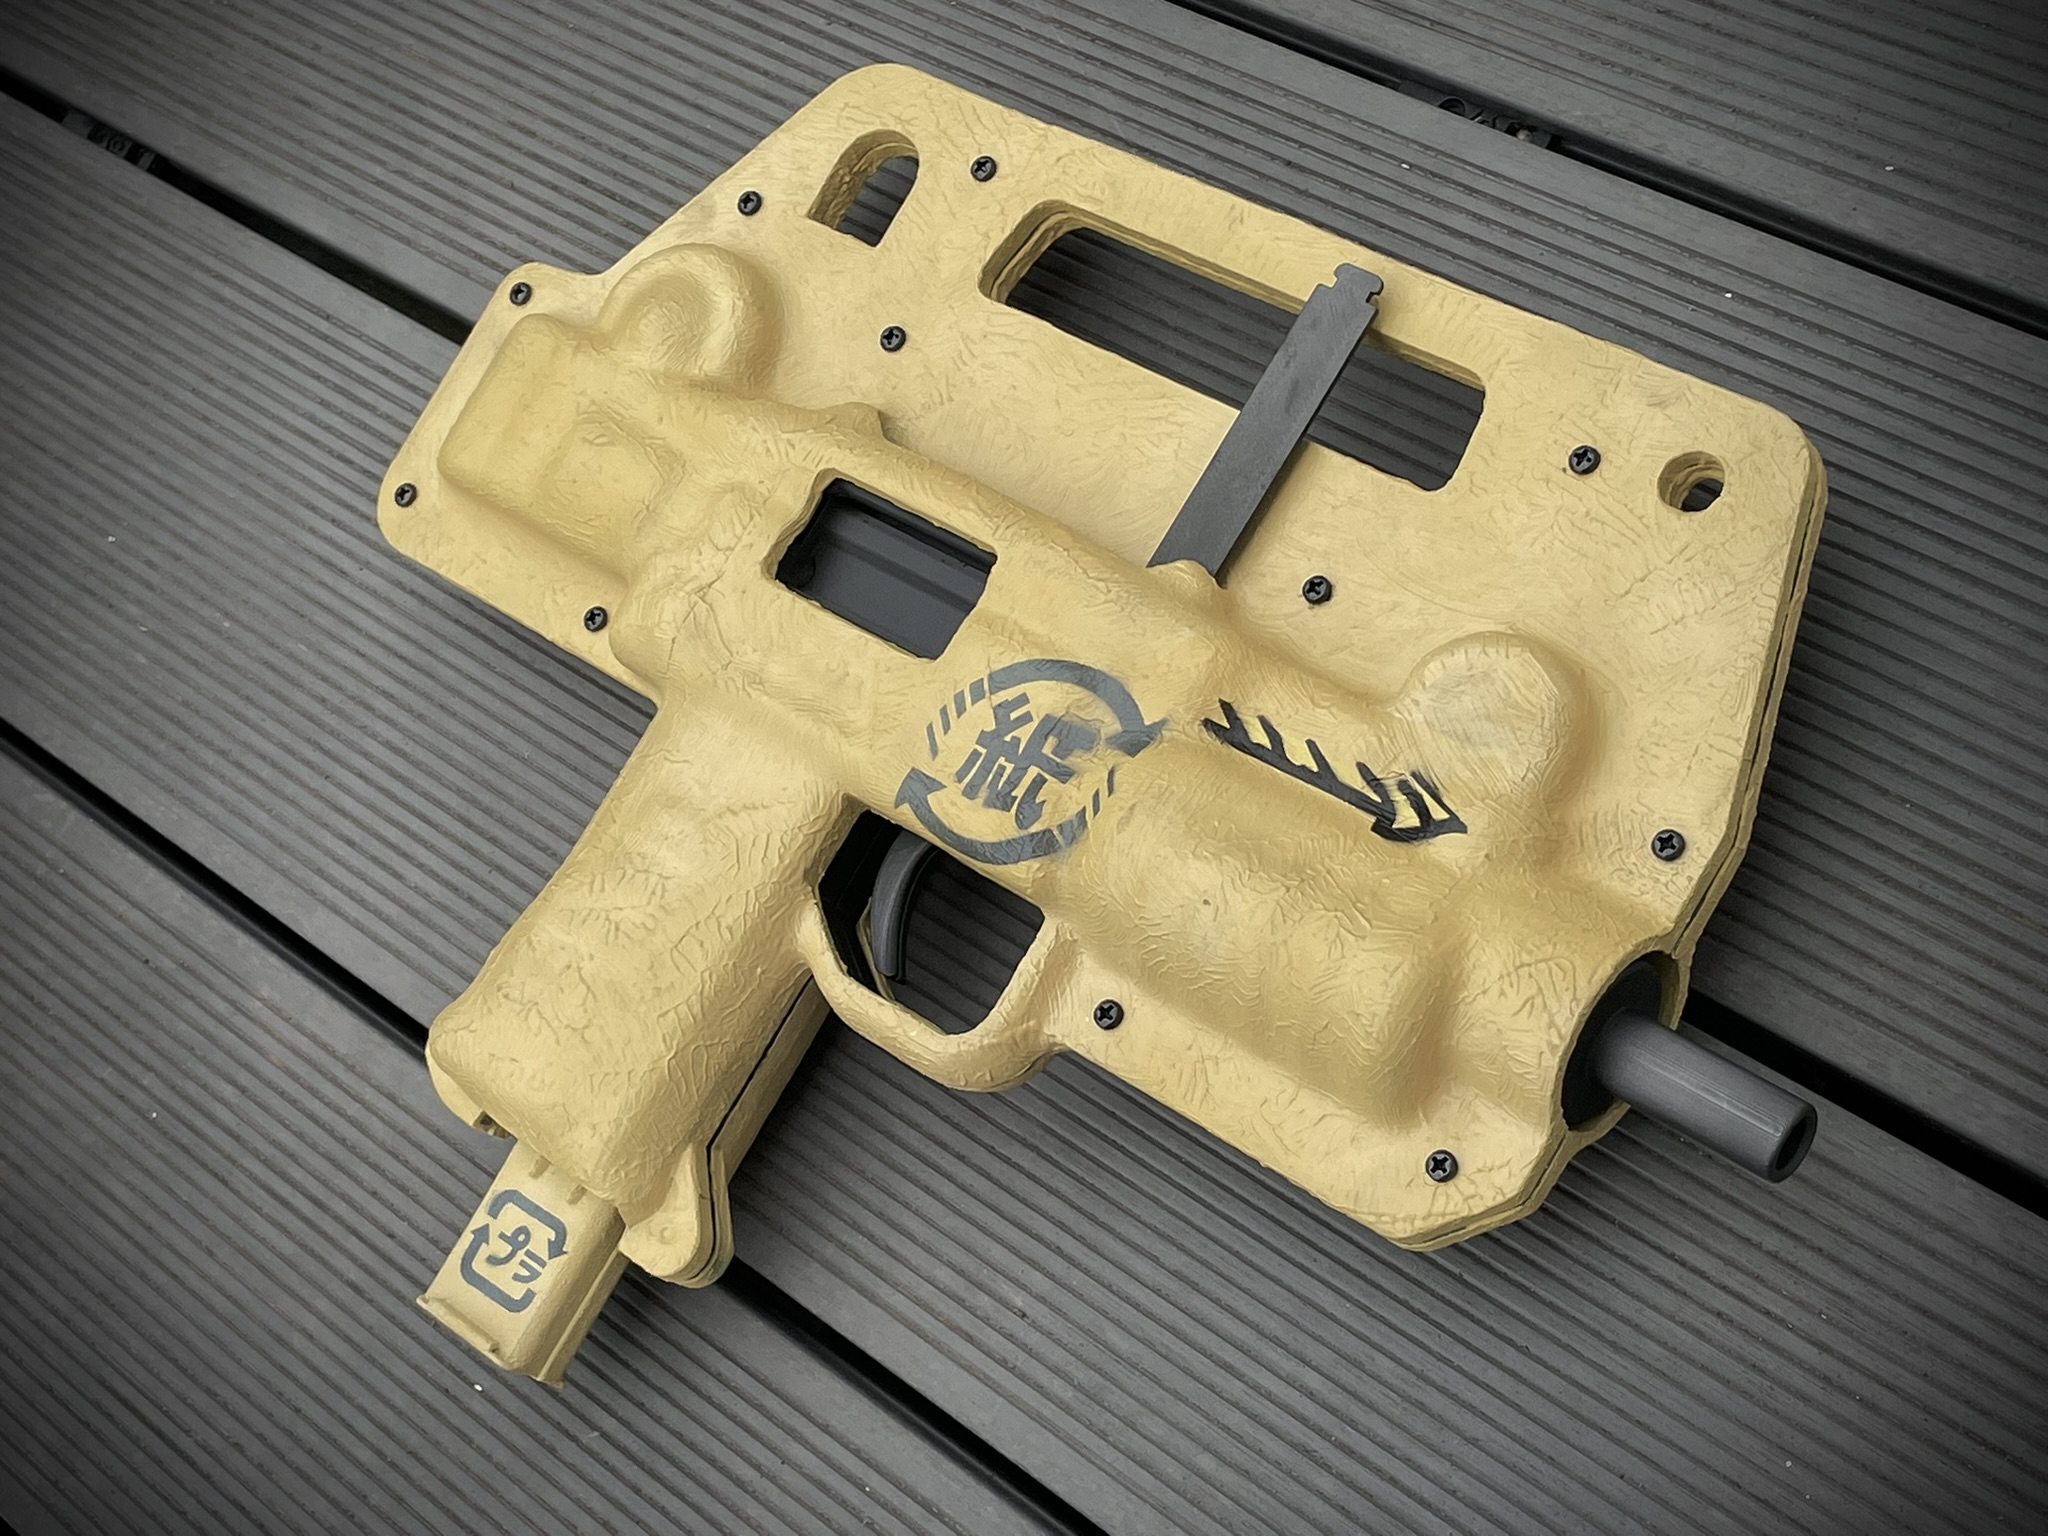
This model is of the shrouded Mini UZI used by the Skinny Man / Garbage Man from both the 1995 anime and 2017 live action movie.
This model is a replica of that used in the 2017 movie.
According to Weta artist William Bennet in his concept artwork, this UZI looks to be designed as a recyclable shop’n’drop weapon. The Japanese recycling stencils back up this concept.
OK, we are a little late to the party with this model as the movie came out in 2017, but we believe the weapon is interesting enough to warrant its creation here in 2026.
We have not seen another model of this weapon.
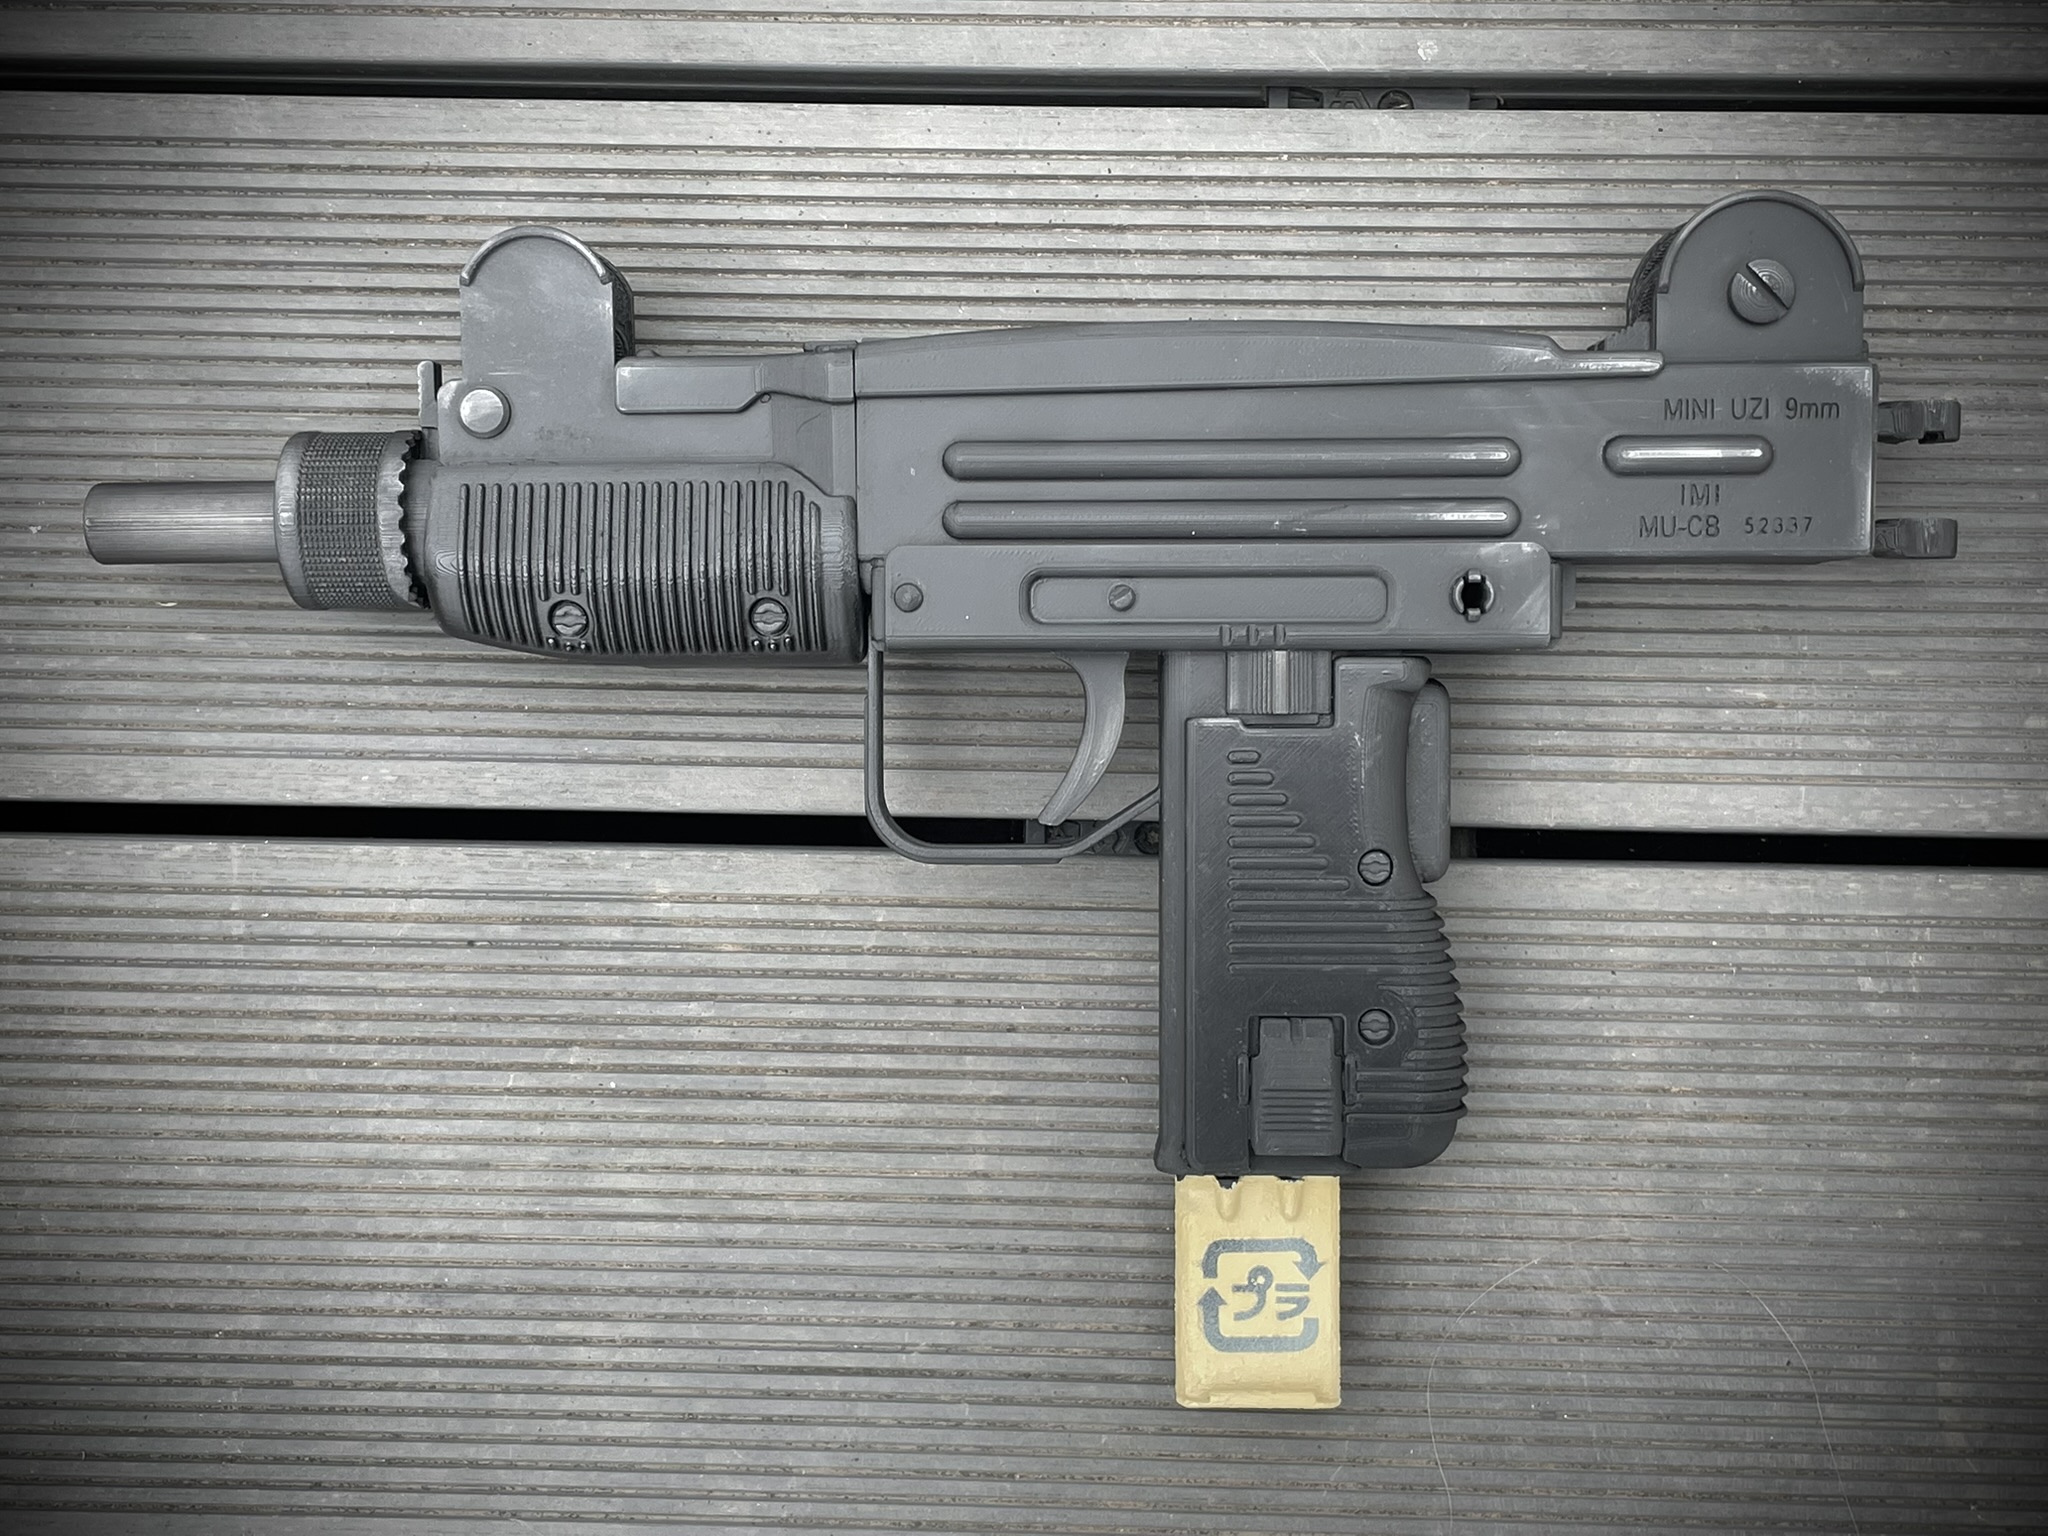
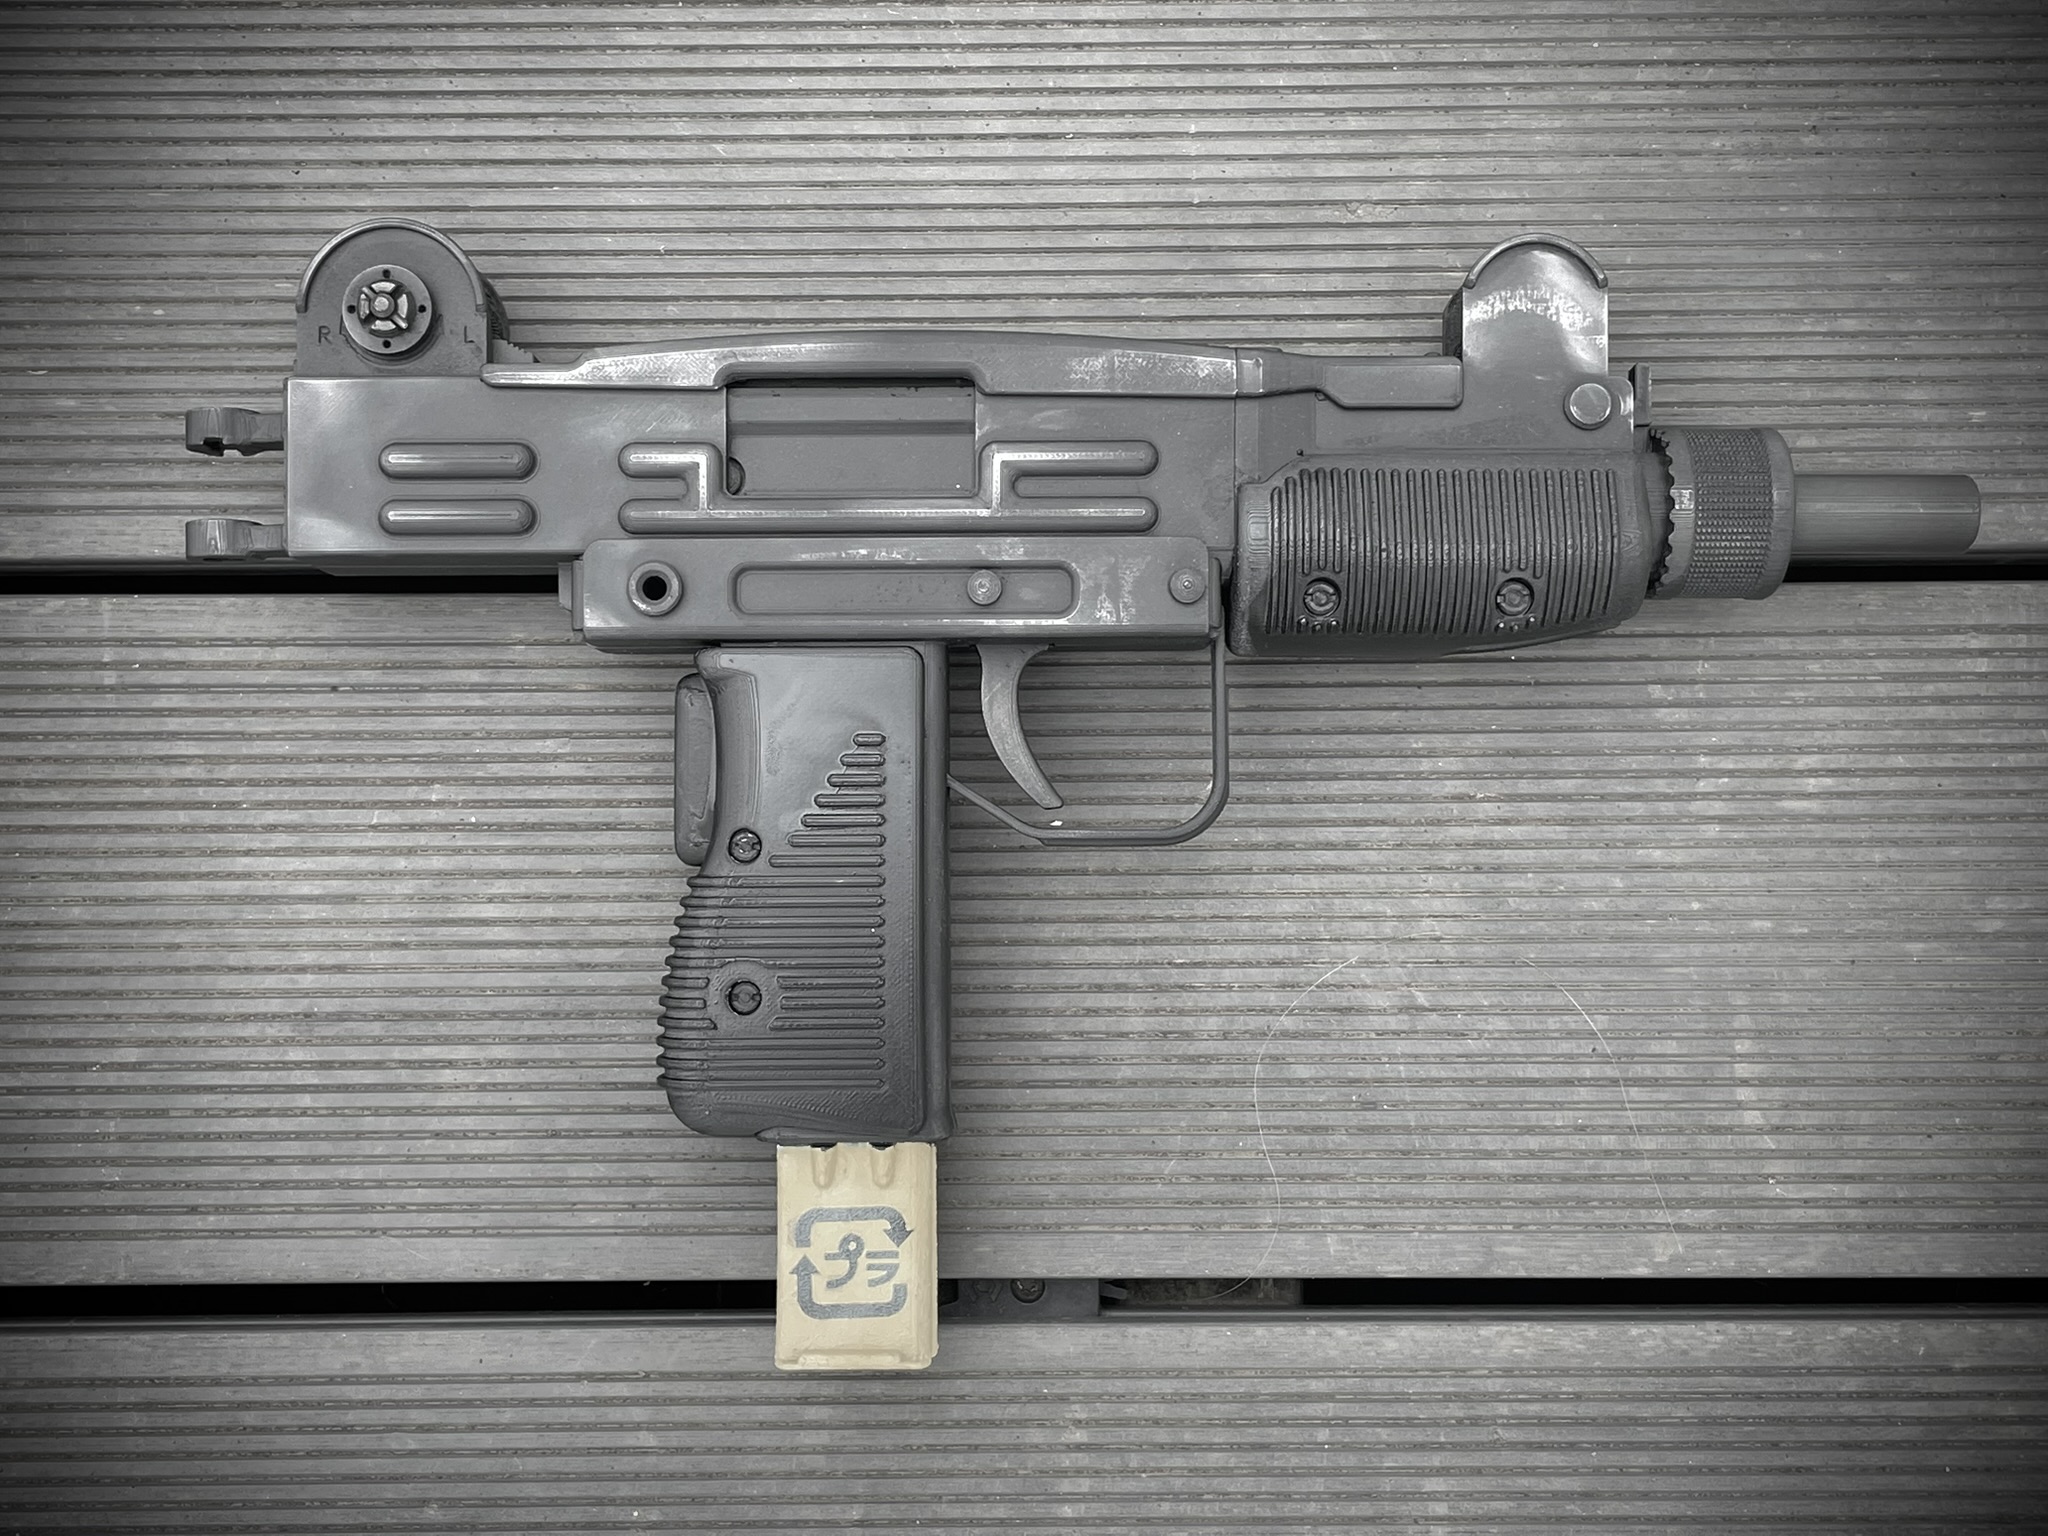
Based on actual IMI Mini UZI dimensions this model is pretty accurate to the available stunt prop photos.
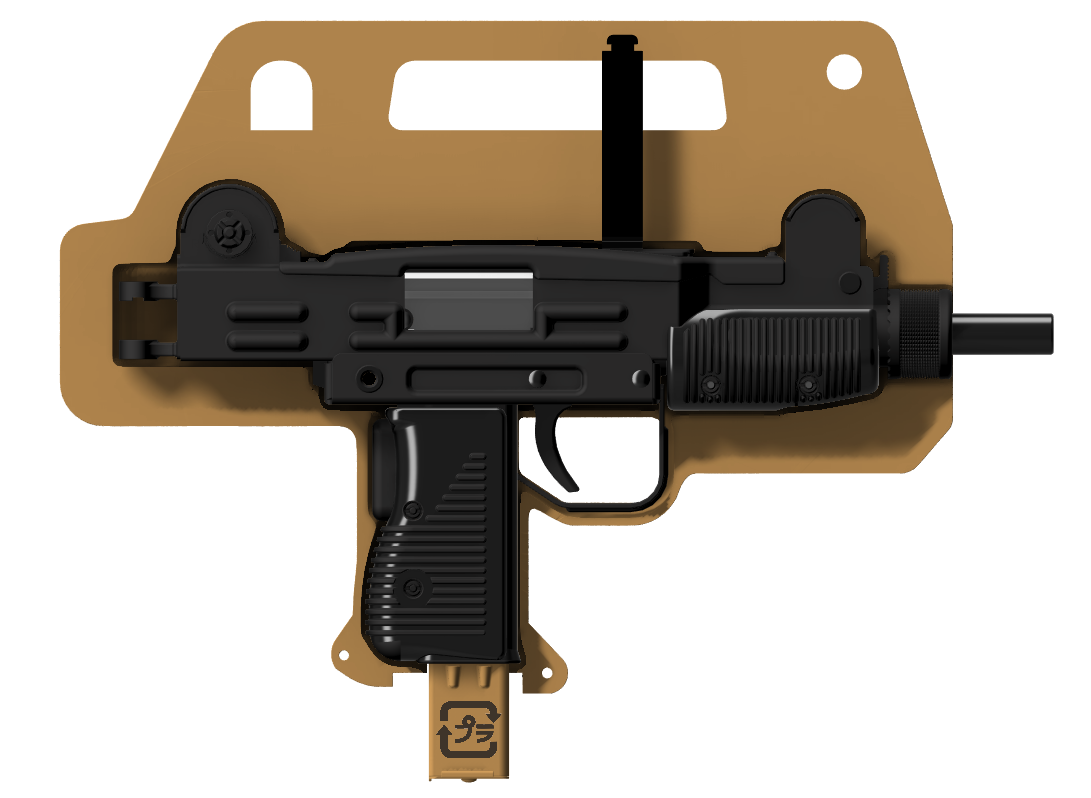
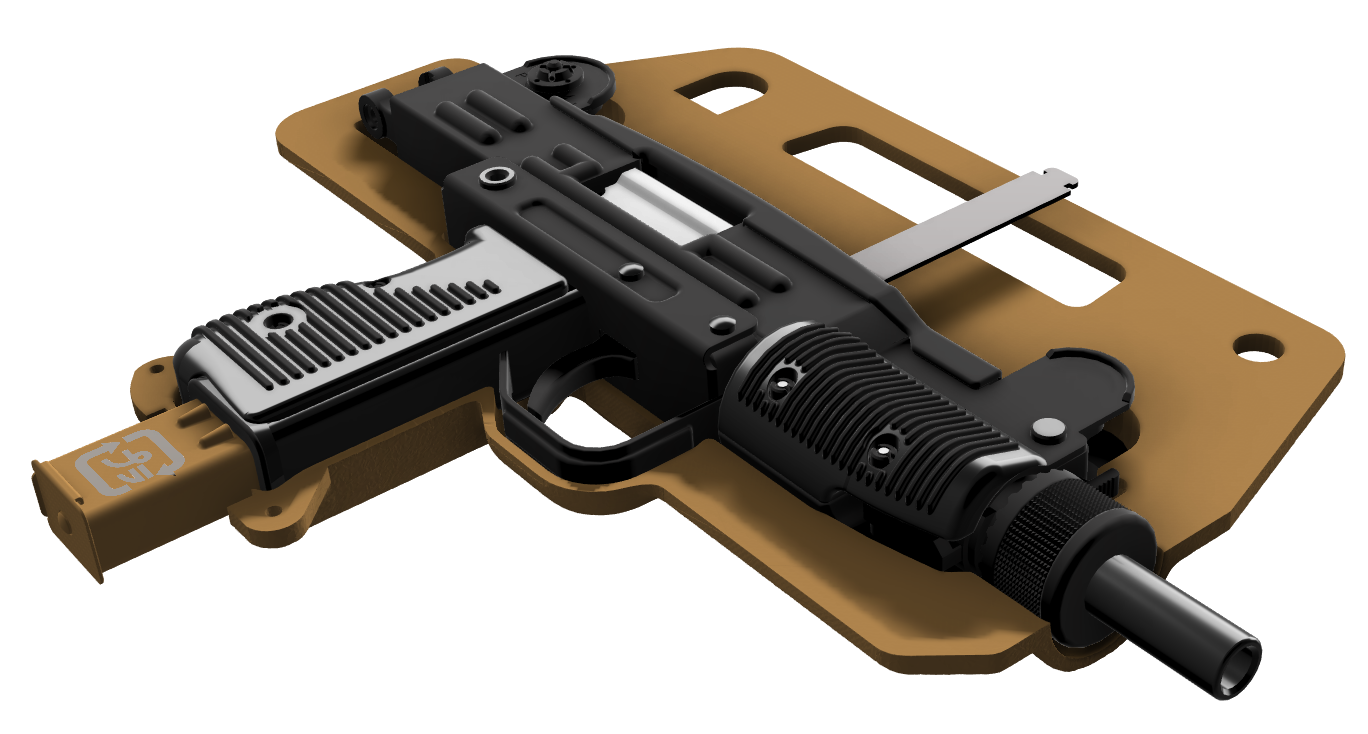
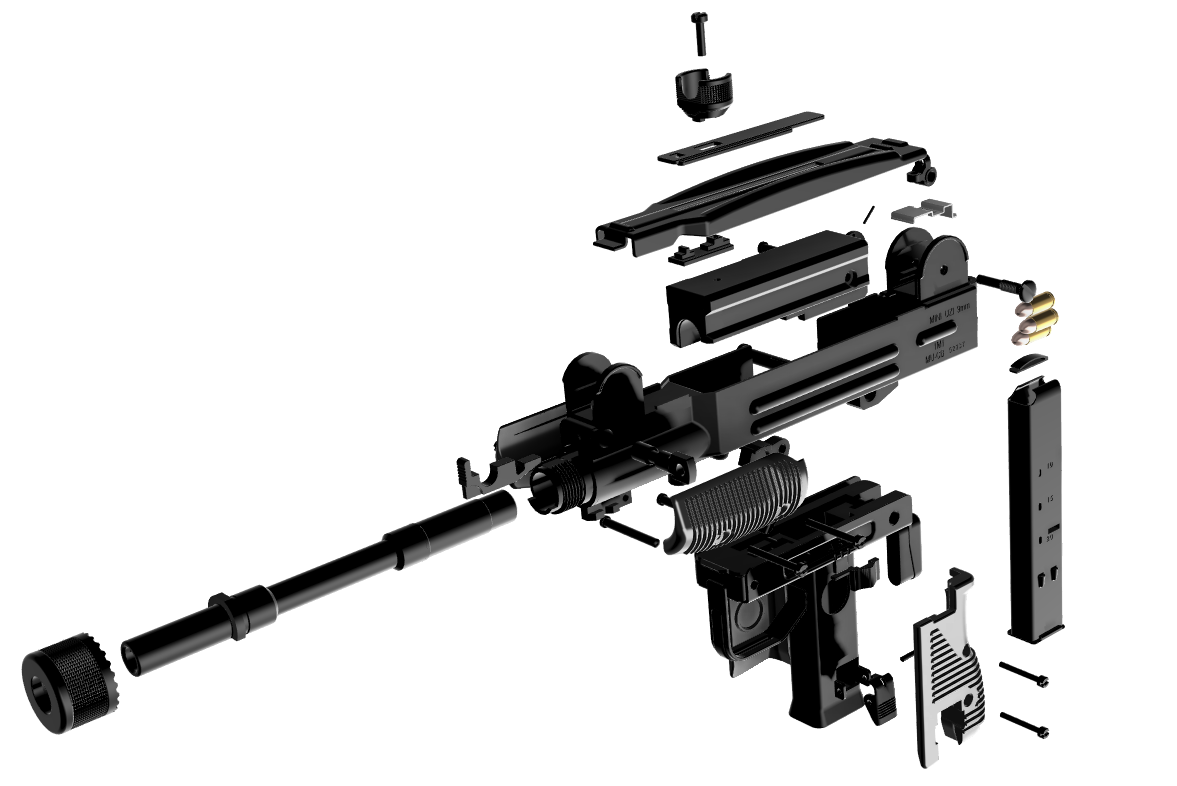
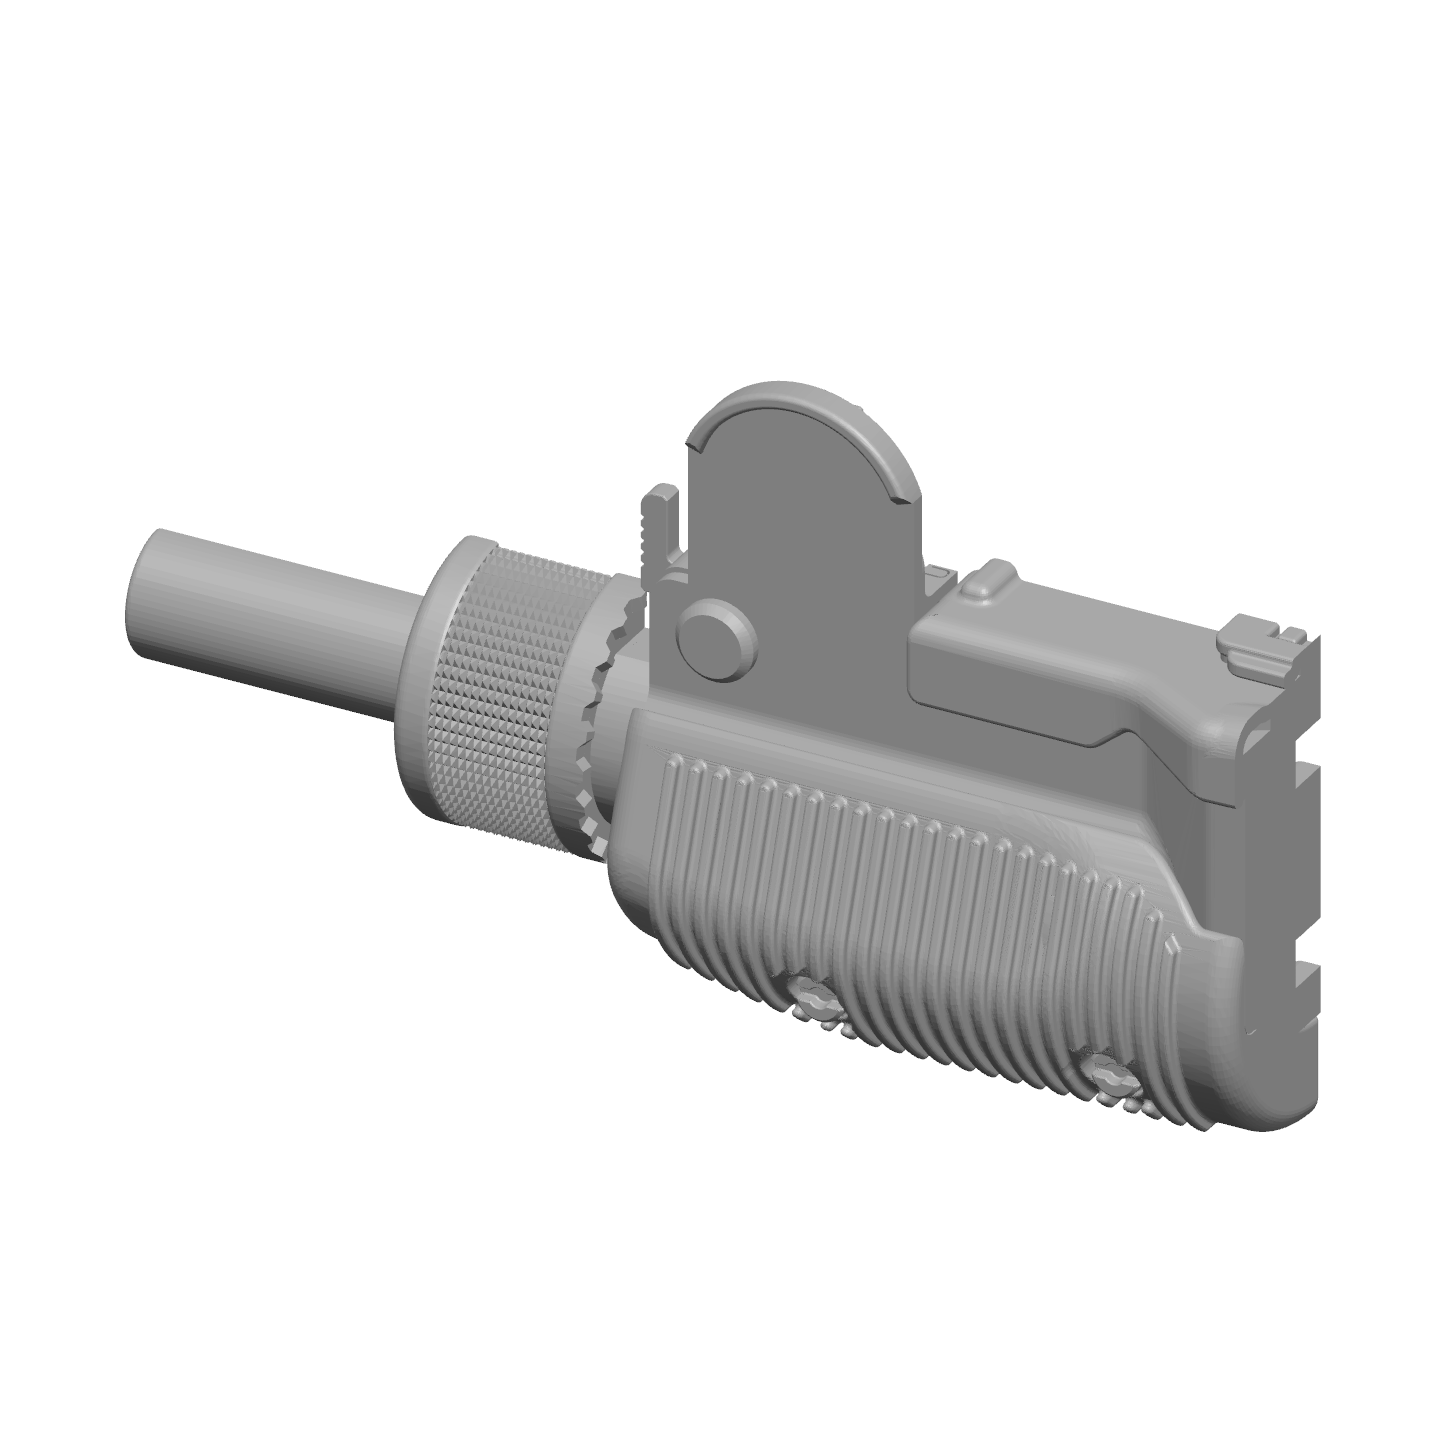
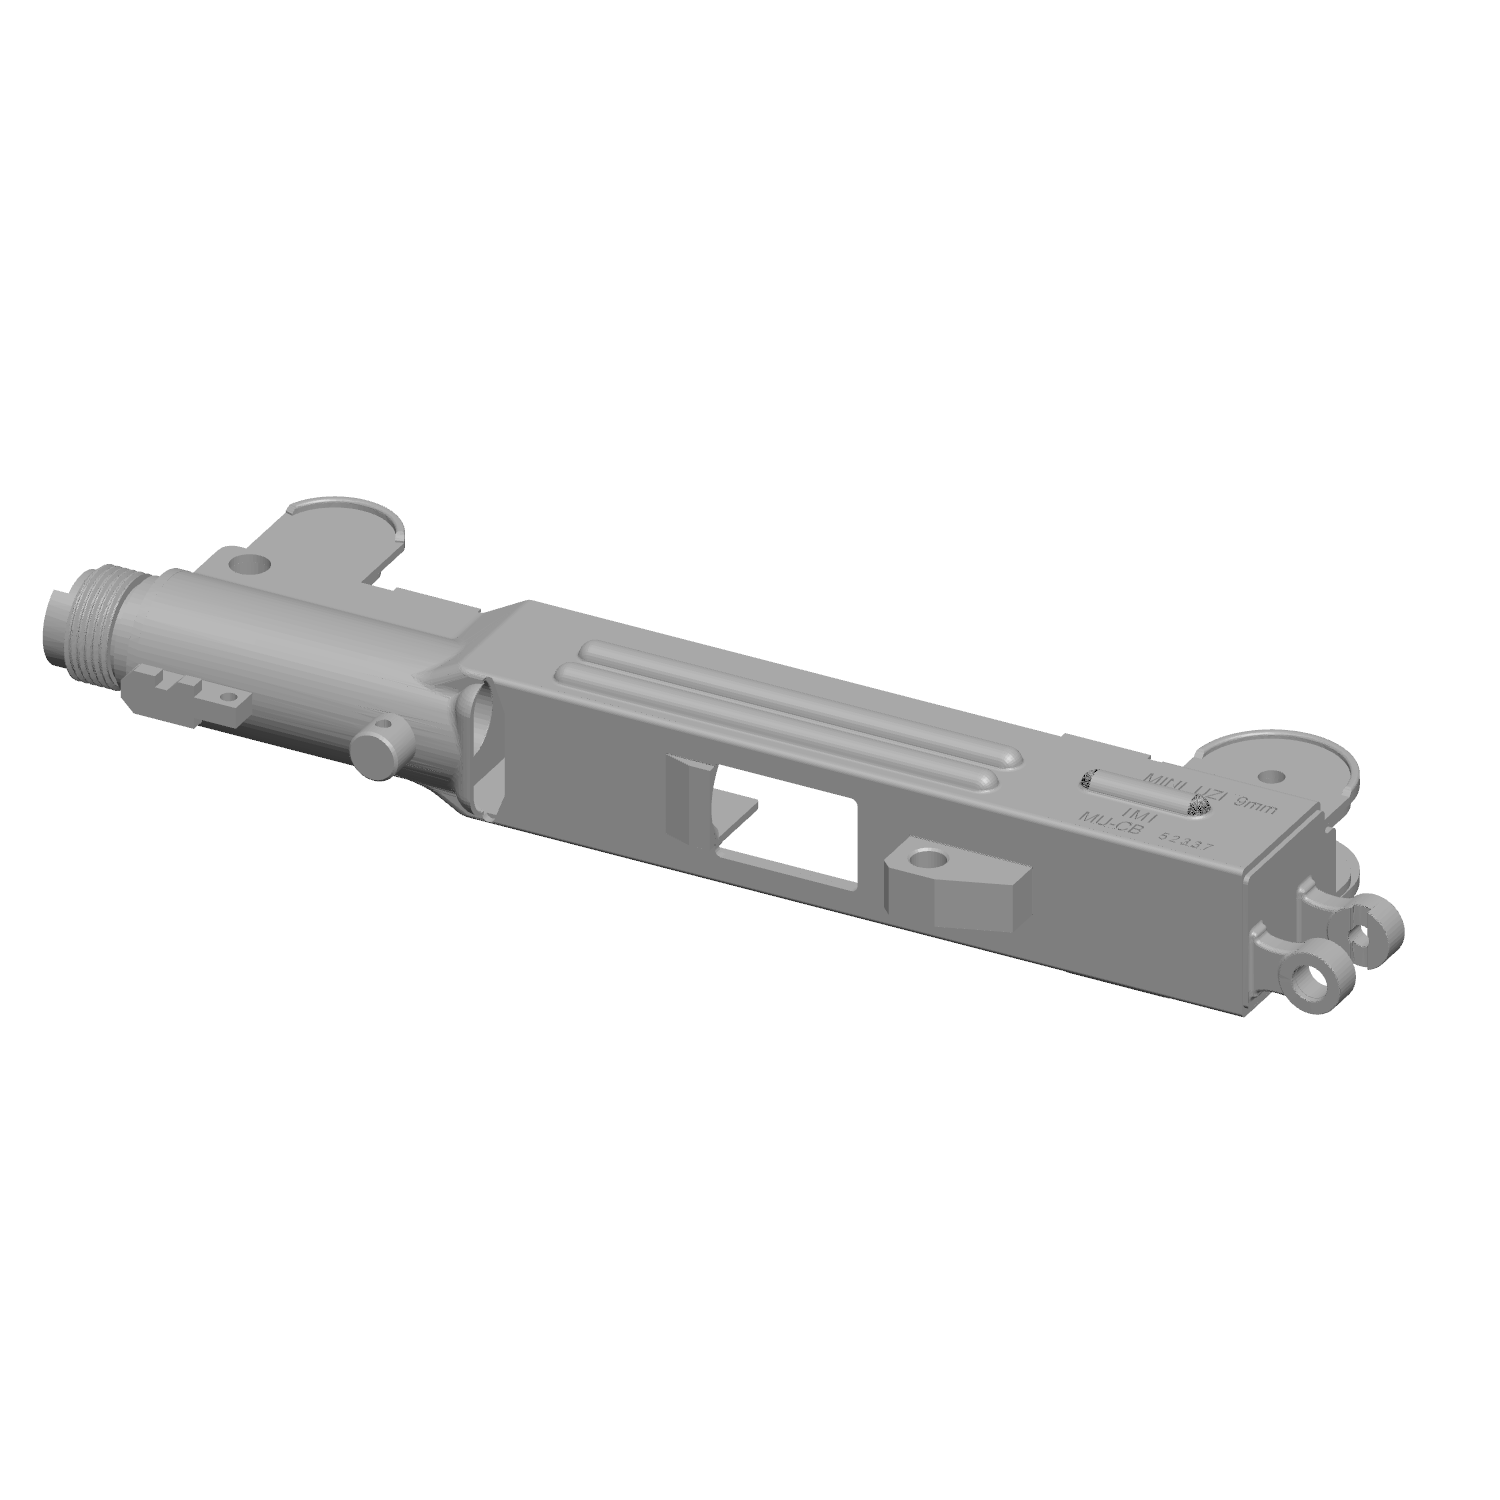
We have also elected to fit an entire high detail, high part count Mini UZI inside the ‘recyclable’ shrouds. While not containing all of the real Mini UZI parts it is a reasonably accurate model modified to suit FDM printing.
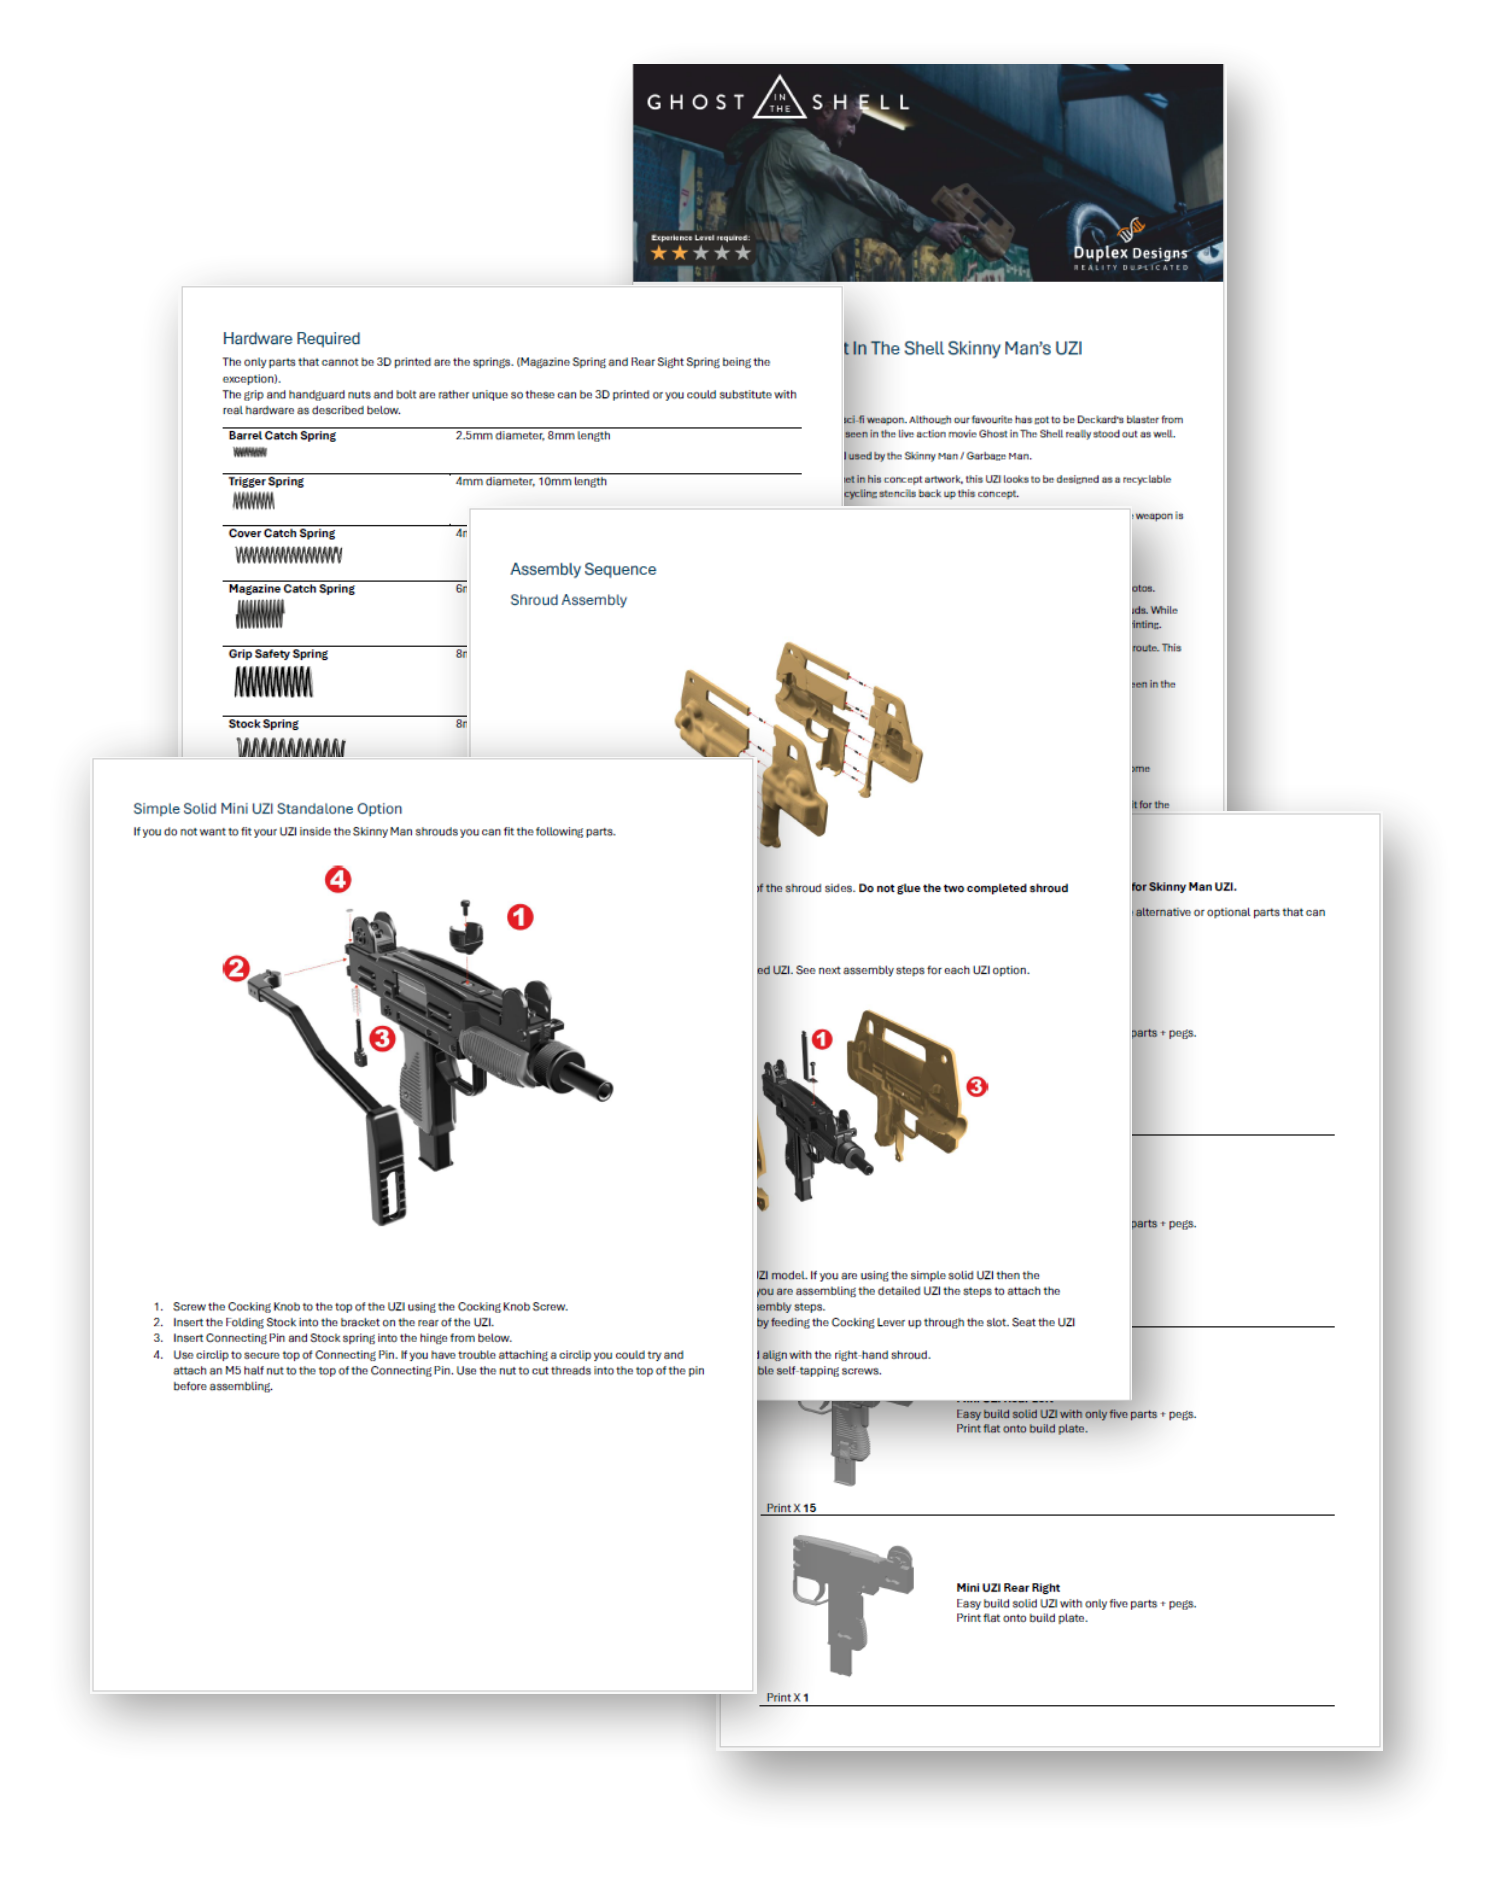
(We also include a solid model split into five parts as well in case you decide to take an even easier build route. This still retains the high level of detail externally.)
Also included are the folding stock and retaining pin and an alternative ported barrel. These are not seen in the movie but will allow you to build a full Mini UZI rather than the movie prop.
You will need a medium level of skill in 3D printing and modelling to do justice to this model.
Part tolerances are quite tight so depending on what you create the parts with you may need to do some sanding and finishing to get parts to fit.
For example, FDM printing at 0.08mm layer height using a 0.4mm nozzle is good enough for a great fit for the assembly but as soon as you start to use resin parts the differences in resin shrinkage and tolerance will start to show. Larger parts are fine with 0.12mm layer height.
NOTE: Although the model contains lots of detailed parts it should not be expected that final build will perform all the mechanical actions expected of the real weapon.
Please consider this a static model. Yes, you can field strip and rebuild this similar to the Mini UZI and the bolt will retract but this is recommended for display purposes only.
Springs can be used on the trigger, top cover release catch, barrel release catch and grip safety. We decided not to add a spring to the bolt although this can still be cocked backwards and forwards.
The magazine catch has been redesigned to allow for a simple spring rather than the original UZI spring.
Finished shrouds require painted graphics. Stencils have been provided as SVG in case you have the ability to laser cut vinyl stencils or use the STL stencils to print a thin stencil for painting graphics. An airbrush is recommended for painting these graphics.
Although most of the Mini UZI will be hidden by the shrouds, we have elected to provide a high detail Mini UZI for fitting inside.
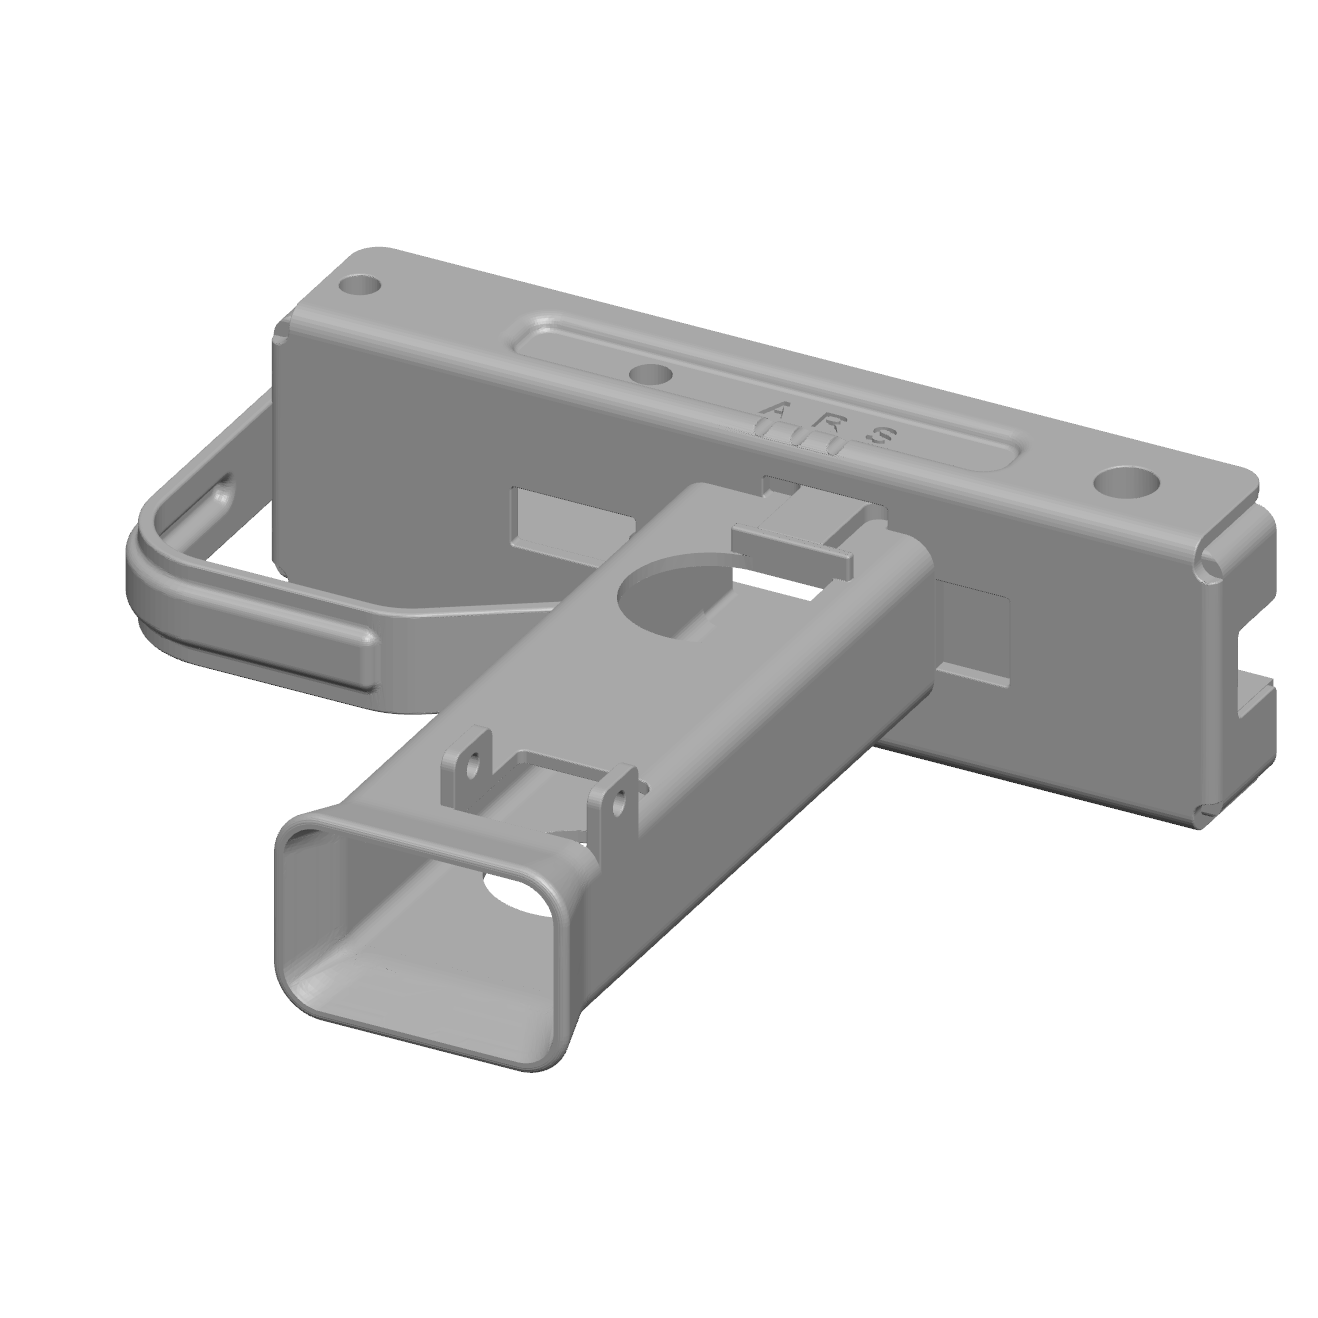
Shrouds are provided as left front, right front, left rear and right rear quarters and each front and rear half are glued together using the provided pins. The two halves are then screwed together, using suitable screws, once the Mini UZI has been placed inside. Shrouds have 4mm holes only on one side for screws to hold the shell together, the other side only has small pilot holes. These screws have not been defined so you can just use whatever suits you. You may need to drill suitable holes in the side that contains only pilot holes, but screws should have a head diameter of at least 6mm and a length of 12mm maximum.
See Hardware Required section for suitable shroud fixing screws.
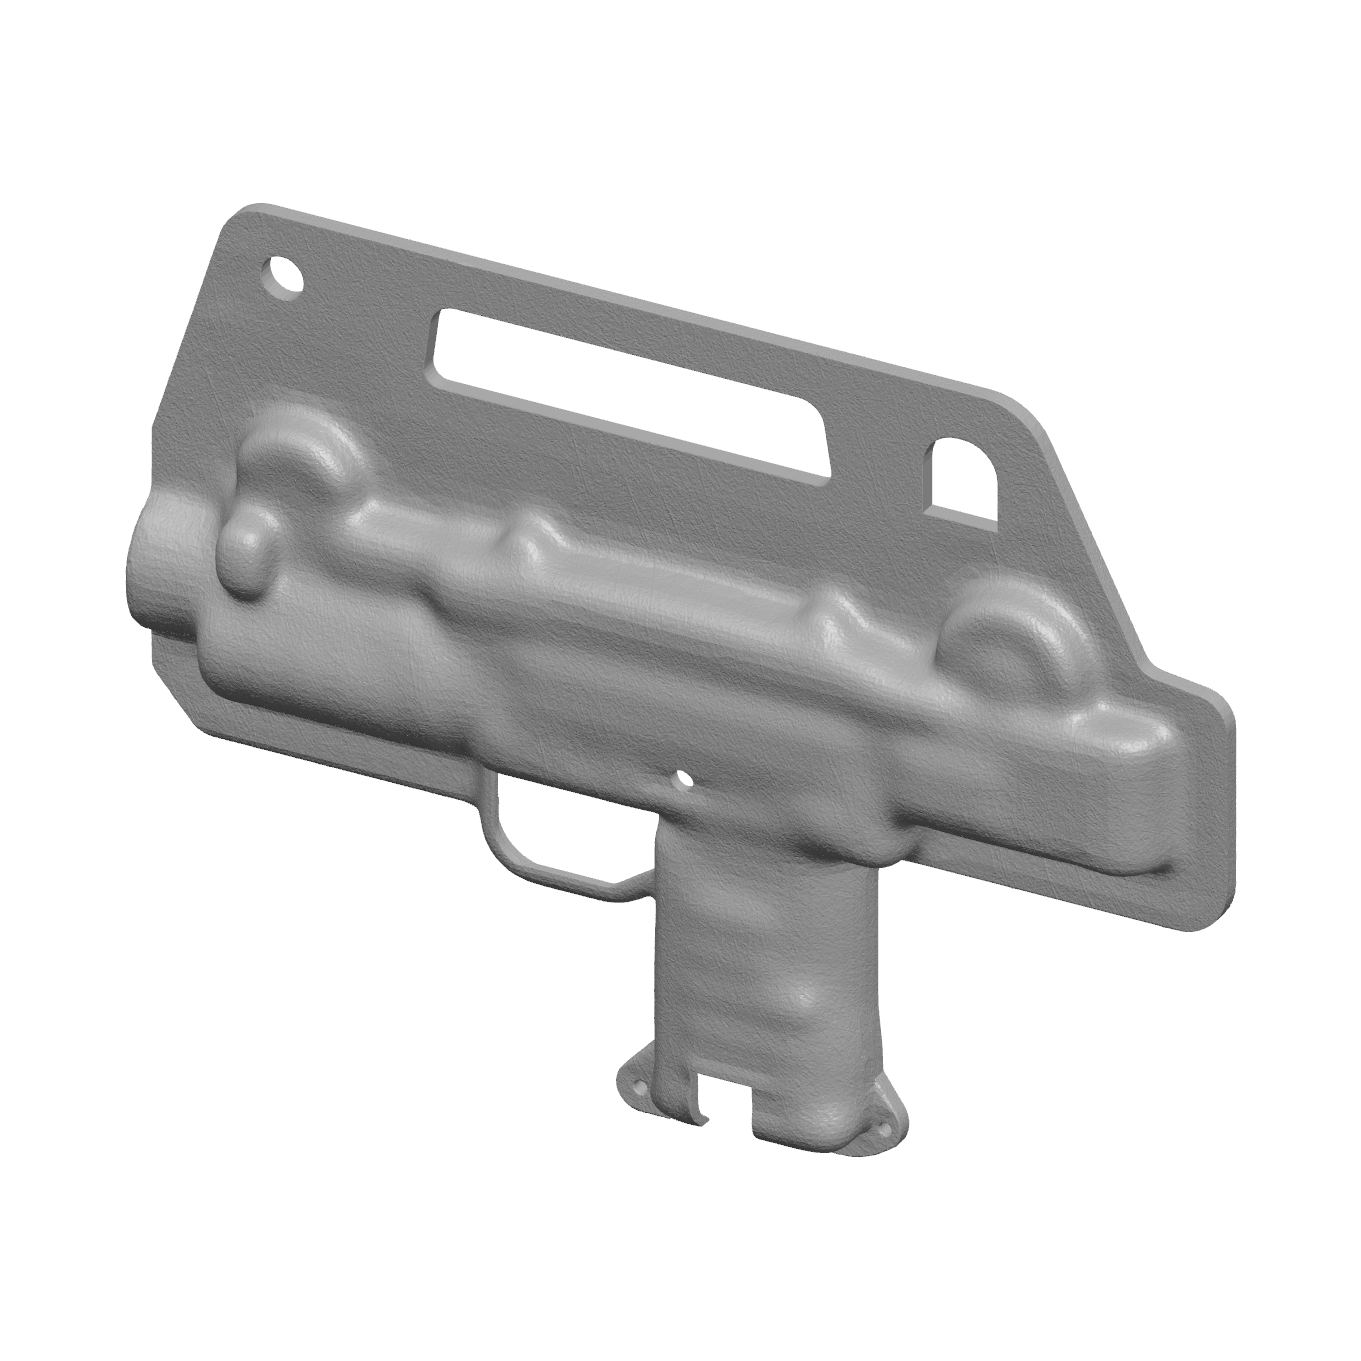
Solid UZI + Shrouds
Shroud side halves are glued together using the supplied pins. A solid Mini UZI model is included that is split into five parts for easy FDM printing. This consists of front left and right parts, rear left and right parts and a final rear end containing the (unused) folding stock hinges. All parts can be glued together using the pegs provided. Use Cocking Lever instead of Cocking Knob on this build.
Detailed UZI + Shrouds
Shroud side halves are glued together using the supplied pins. A more detailed UZI can be constructed using multiple parts that attempt to conform, where possible, to actual Mini UZI construction methods. This UZI model has moving parts such as trigger and magazine. Use Cocking Lever instead of Cocking Knob on this build.
NOTE: You could omit all of the springs apart from Trigger Spring if you did not want moving parts inside the shrouds.
Solid UZI No Shrouds
If you just wanted a Mini UZI model you can print the solid UZI model and add the included Cocking Knob, Folding Stock and Retaining Pin. Although consisting of few parts this is still a high detail representation of the Mini UZI.
Detailed UZI No Shrouds
A complete Mini UZI can also be created from the detailed parts. Just add the included Cocking Knob, Folding Stock and Retaining Pin. Also supplied is a ported barrel which may be used on this model. The magazine can hold three dummy rounds and contains a small 3D printed spring to allow rounds to compress slightly up against the bolt as the magazine is inserted.
A complete build and assembly document is provided which includes step by step assembly instructions.
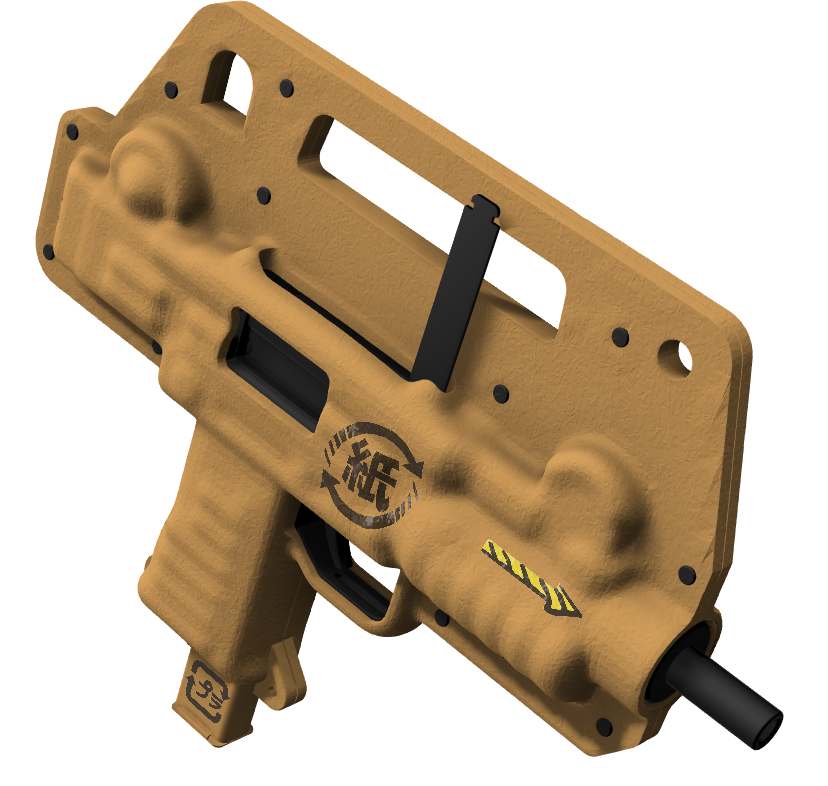
A high detail replica of the modified shop 'n' drop Mini UZI .