Gambody Viper MkII
You will need the complete Viper model available from Gambody.
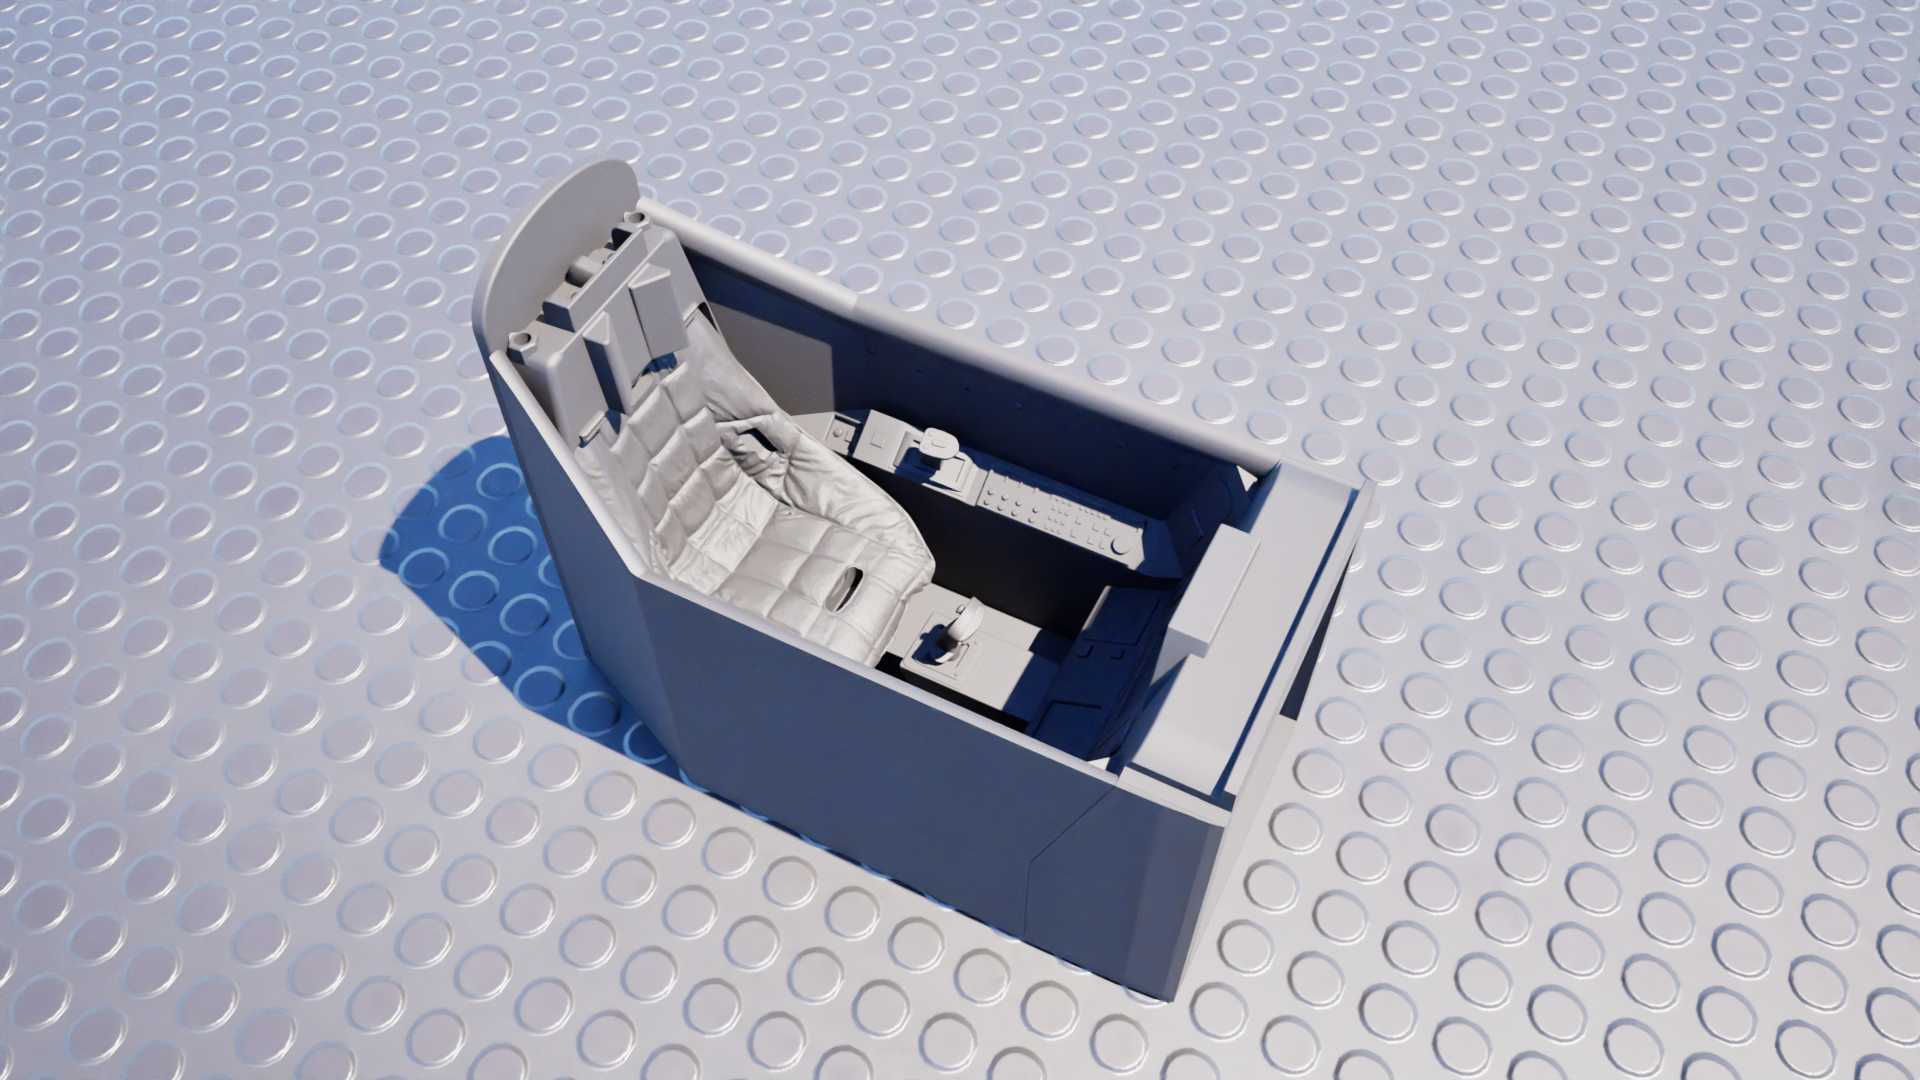
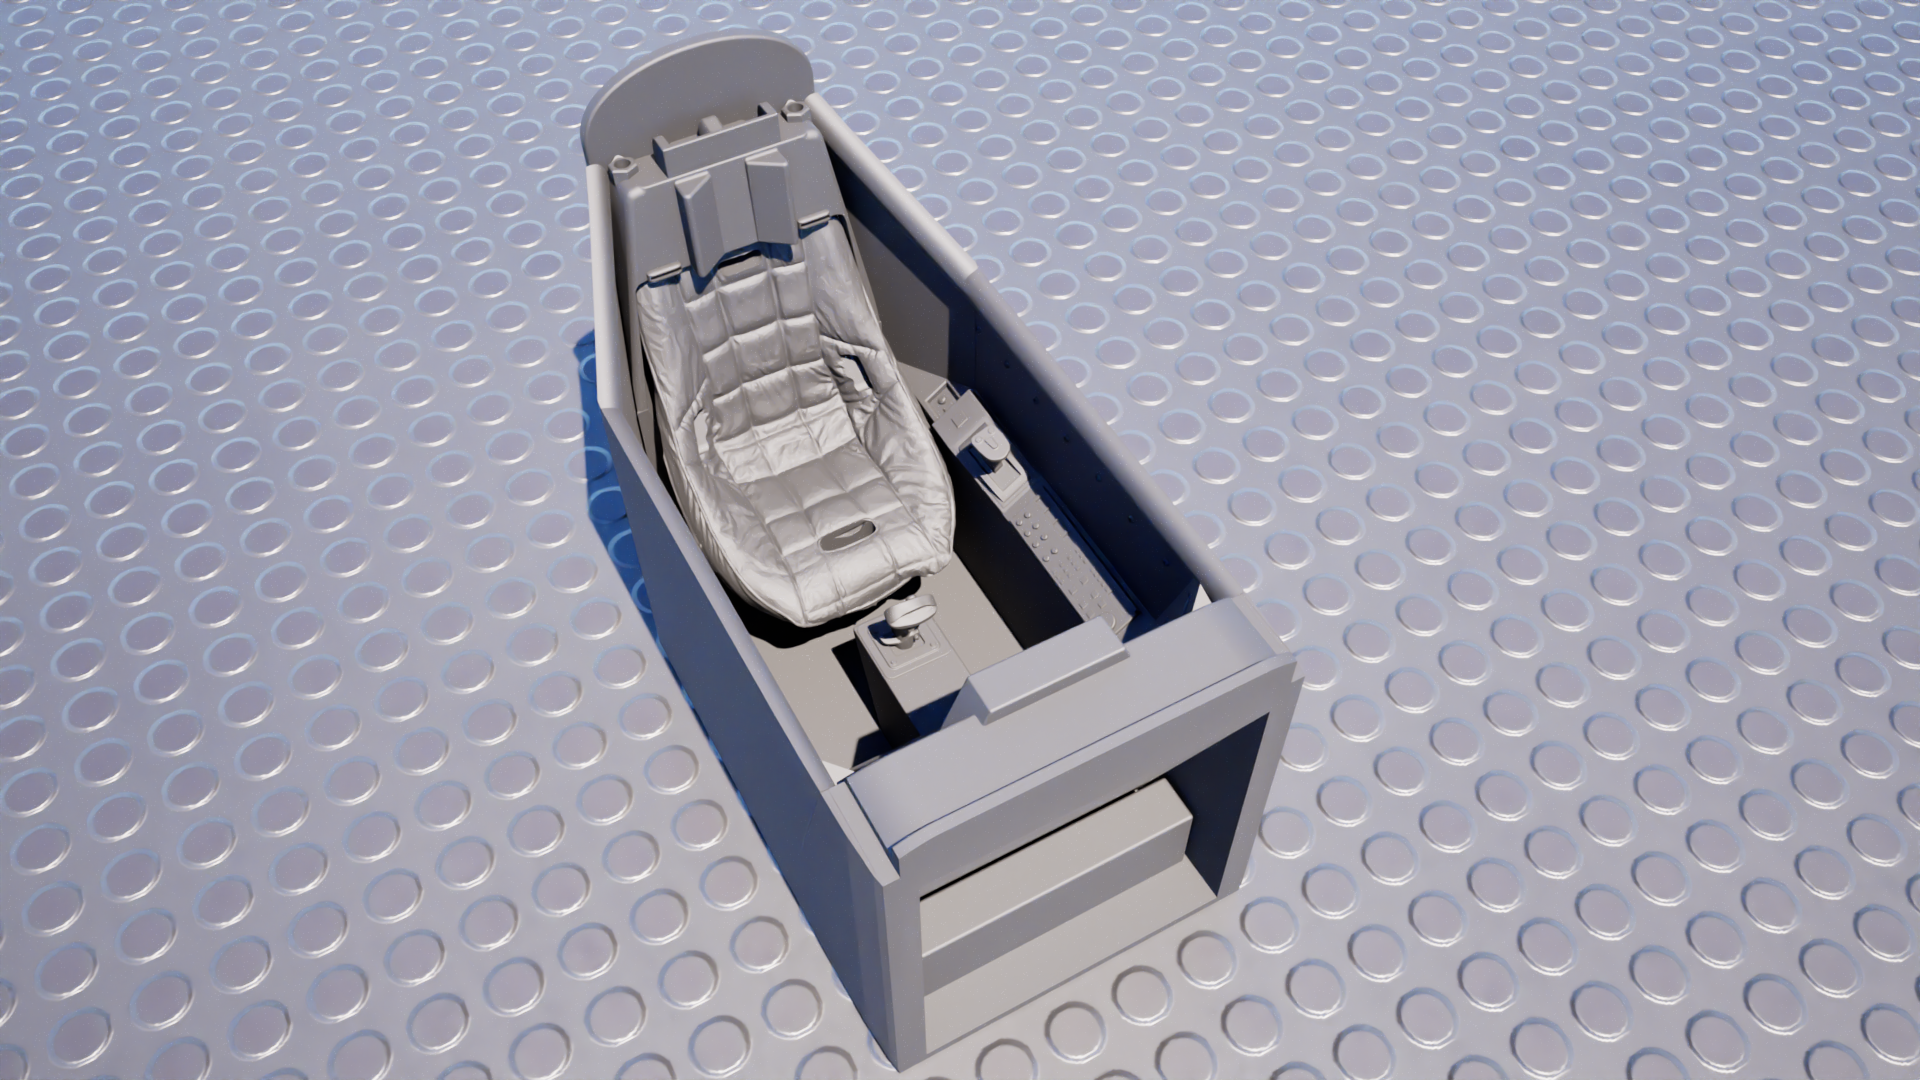
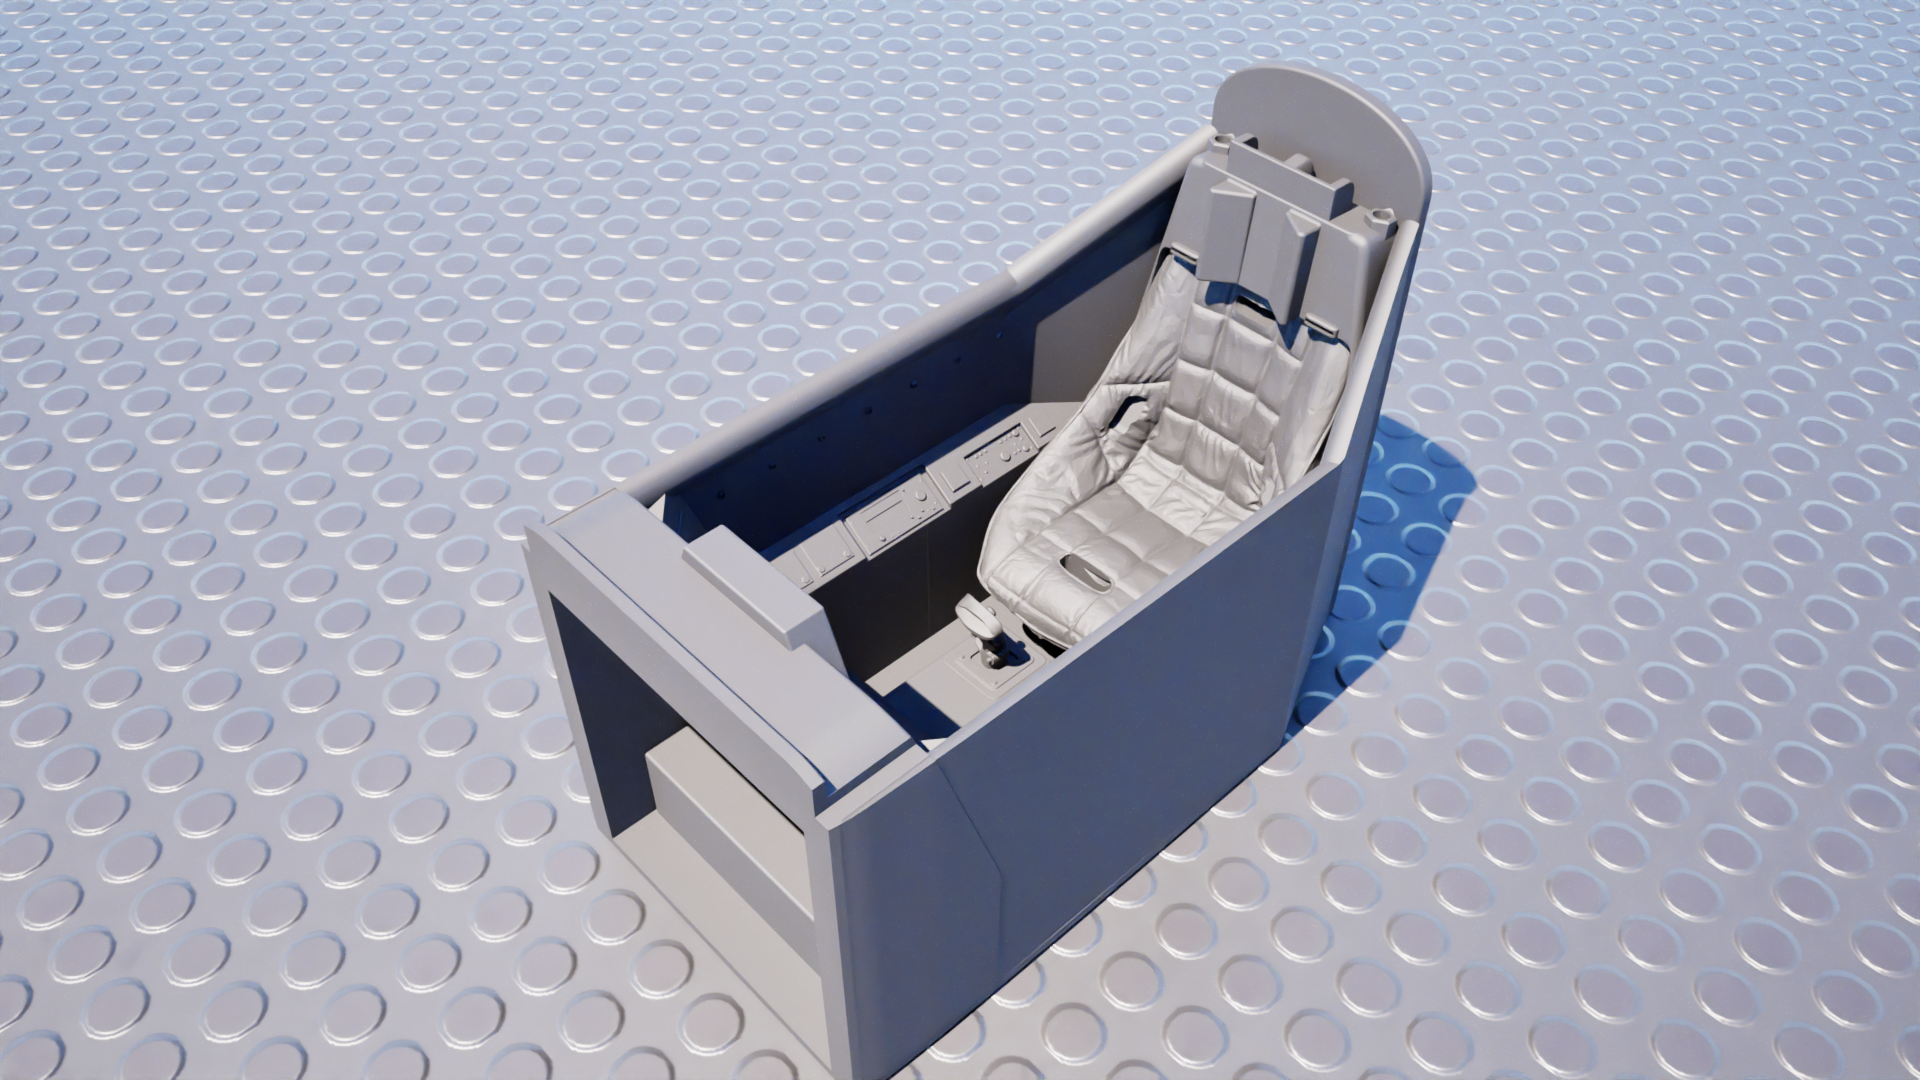
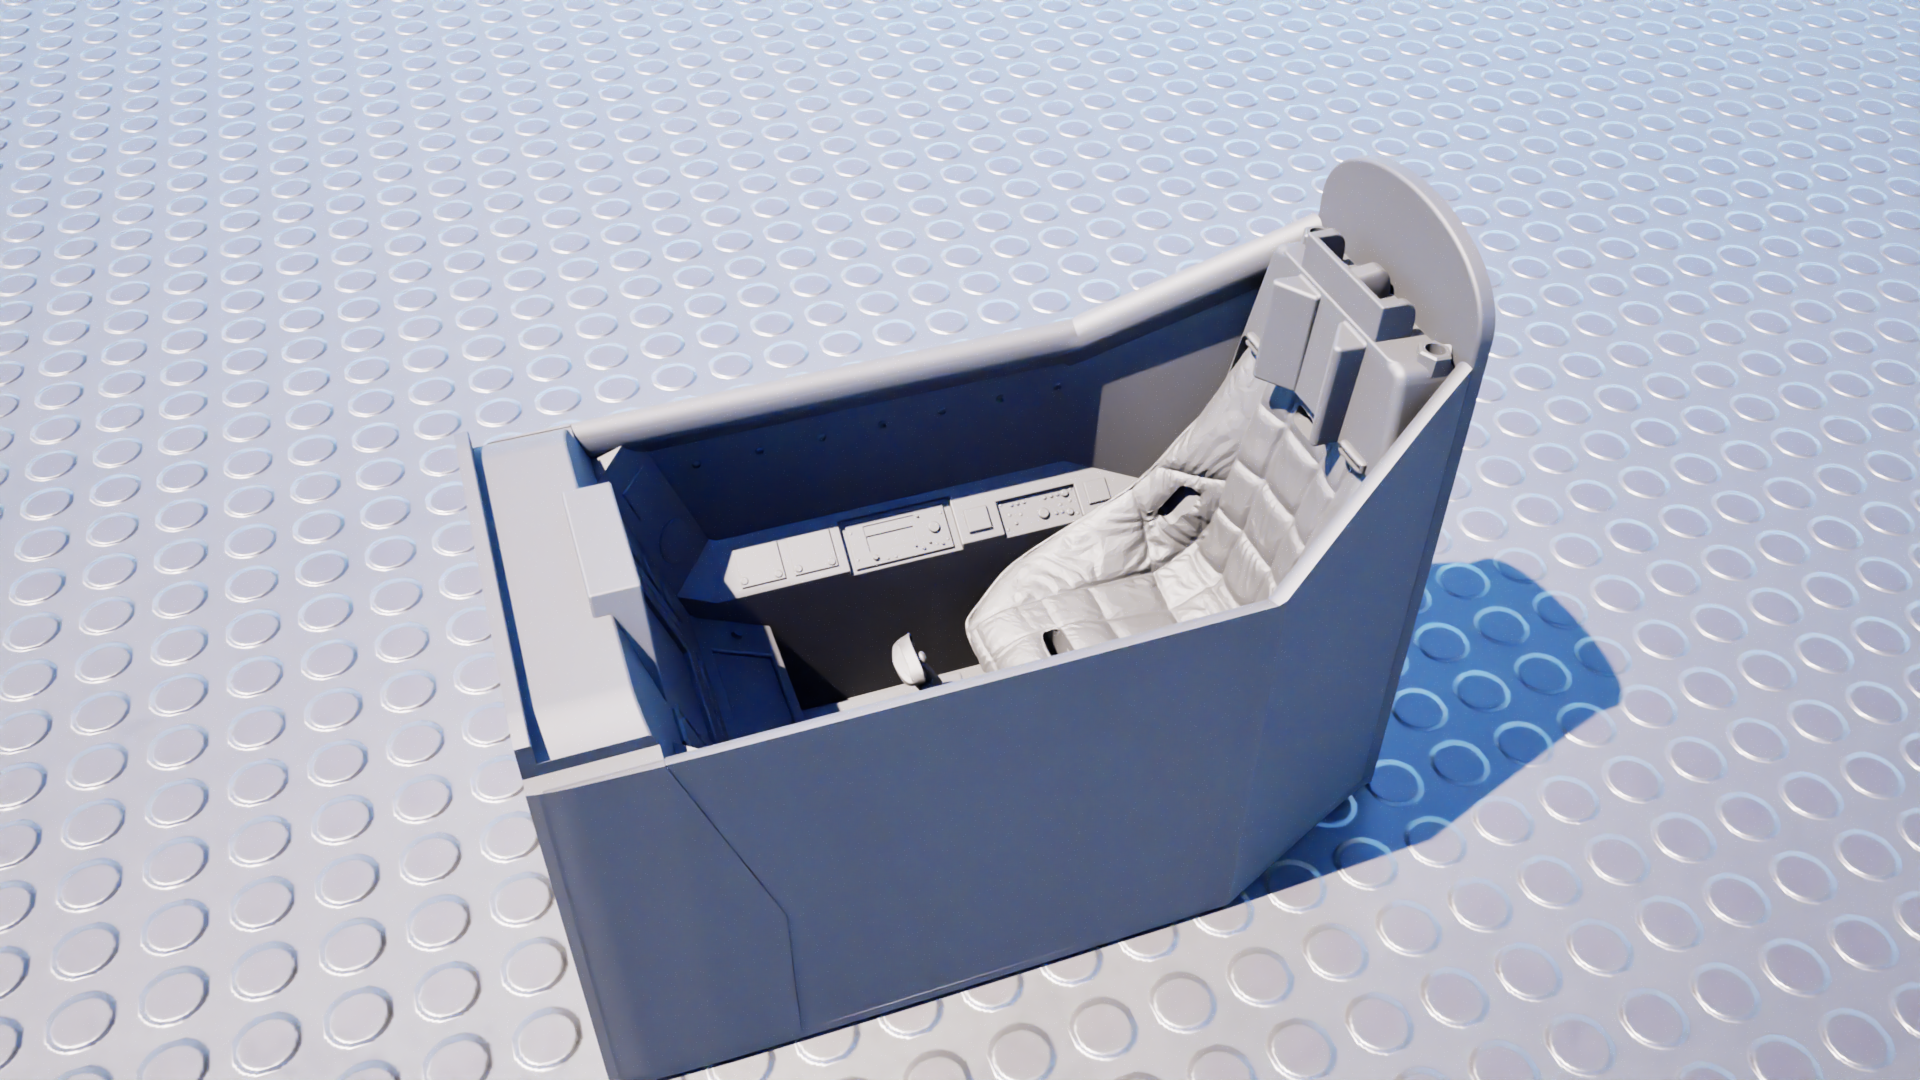
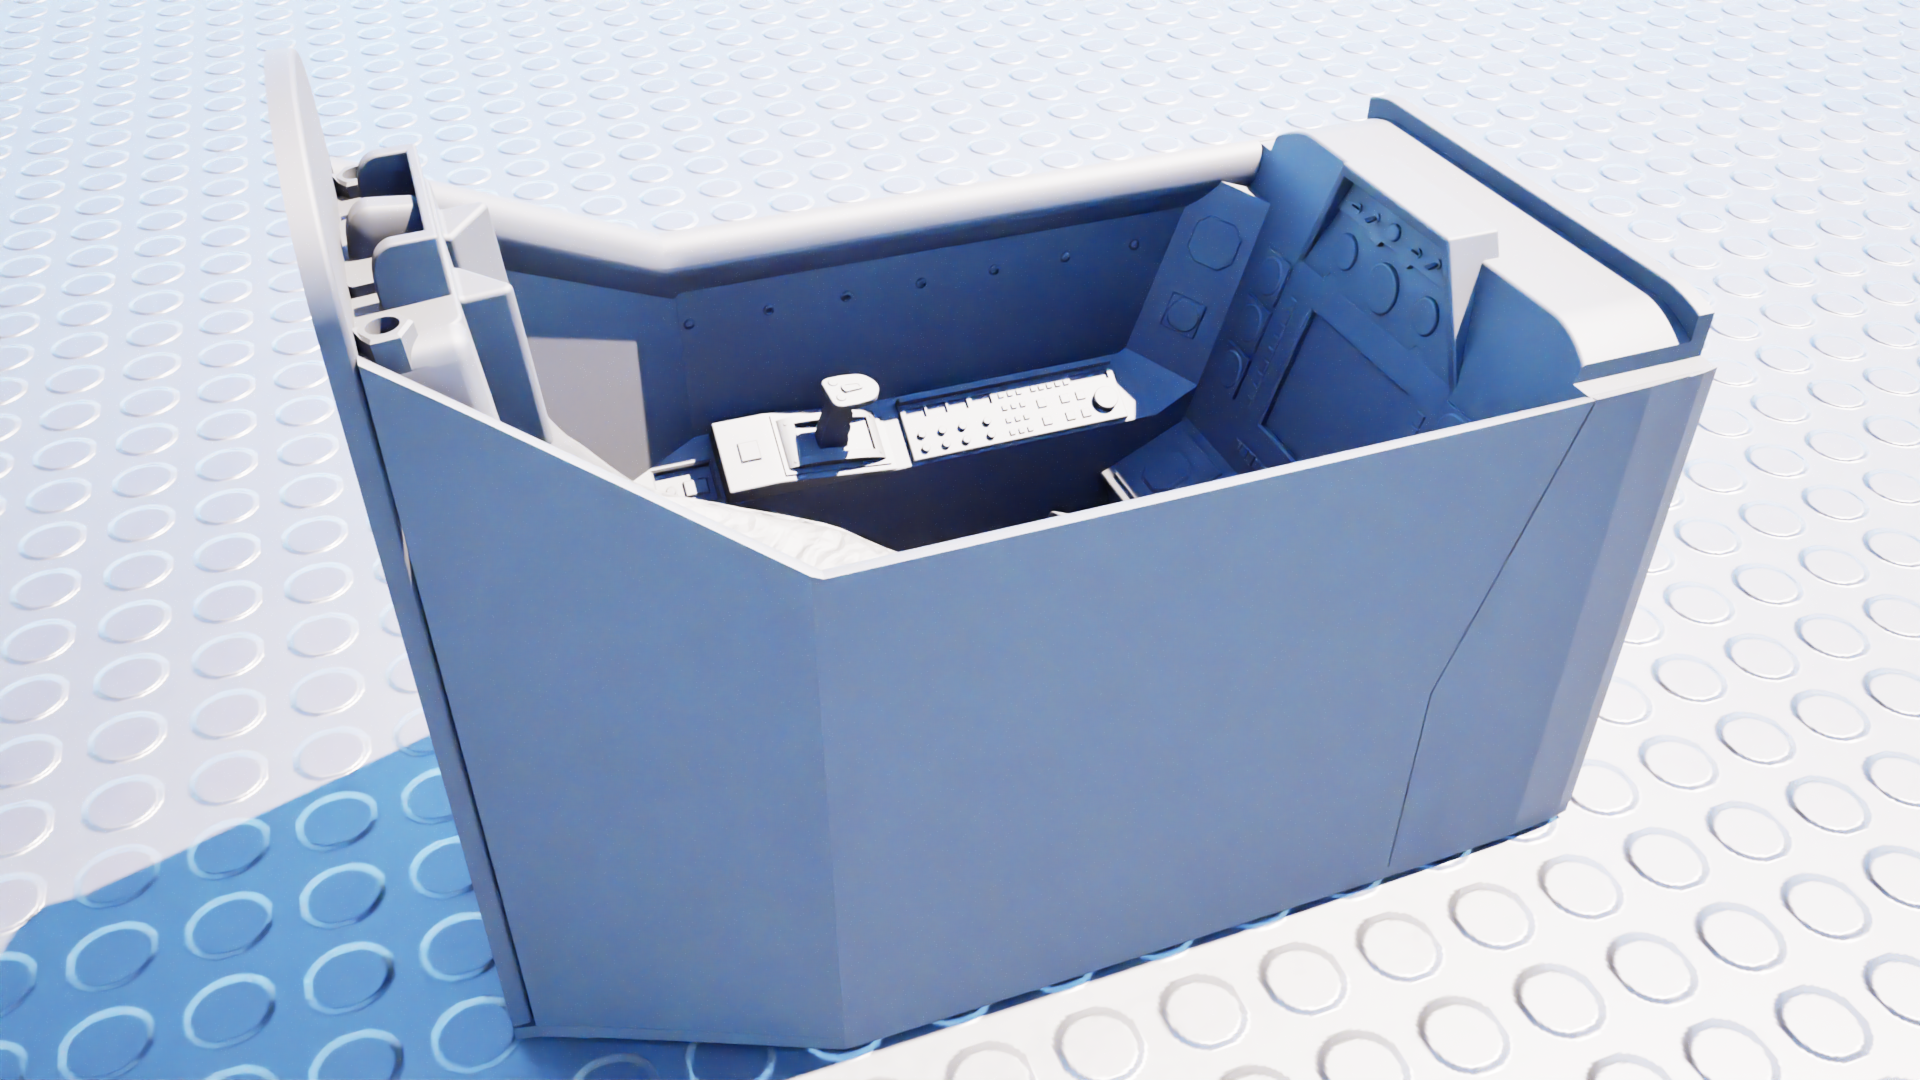
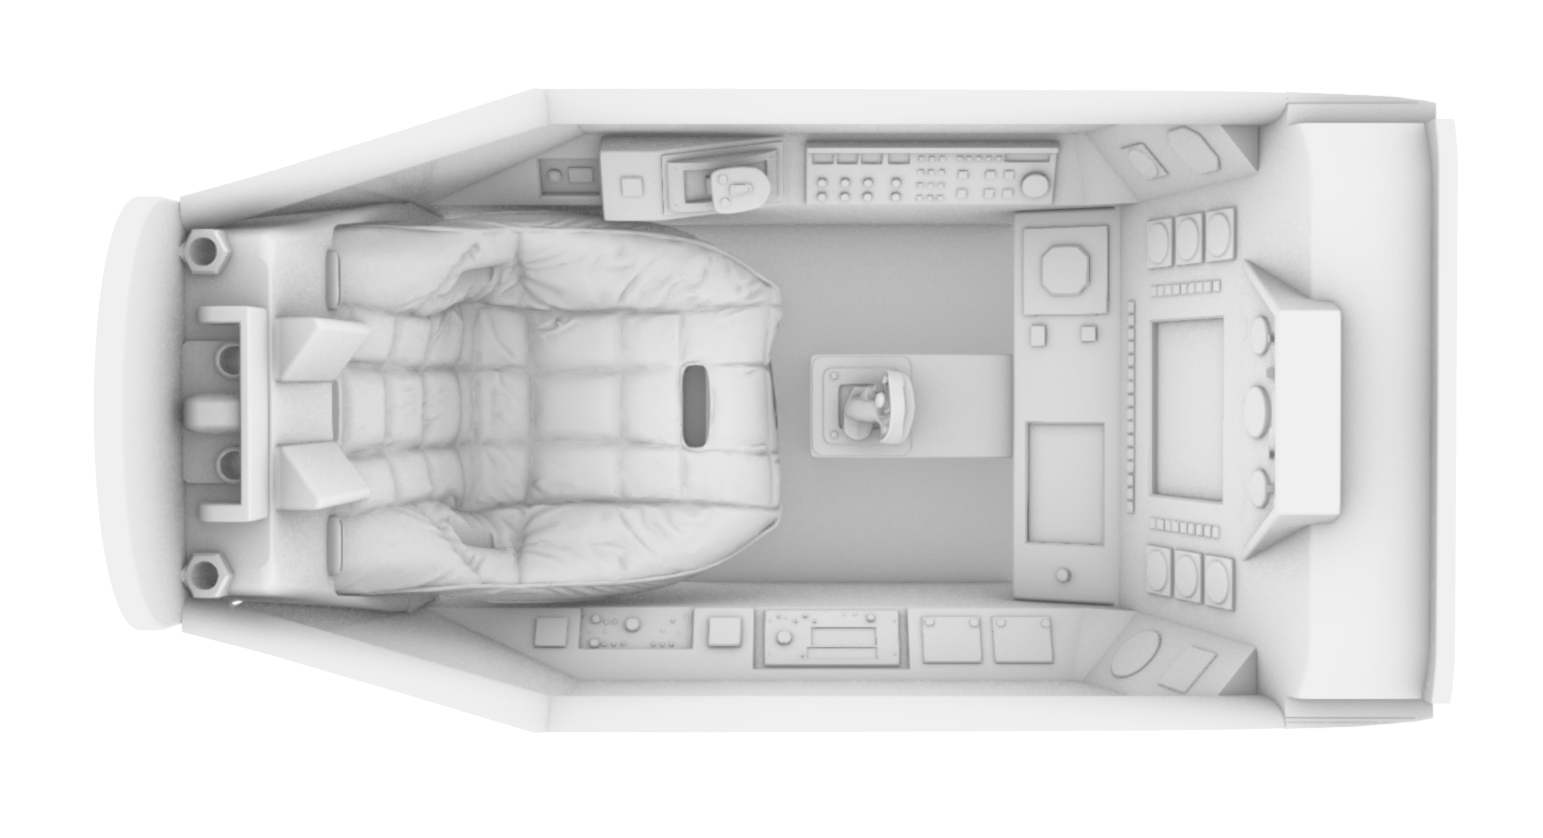
This detail kit provides a replacement screen accurate cockpit and decals for the Gambody Battlestar Galactica Viper MkII 3D model. Ideal for those that want to print a larger scale Viper model than the supplied size by Gambody.
Gambody BSG Viper MkII on Gambody See on Gambody
Gambody is a great source of easy to print 3D models but sometimes the accuracy of the model suffers in order to provide easy printing for the masses.
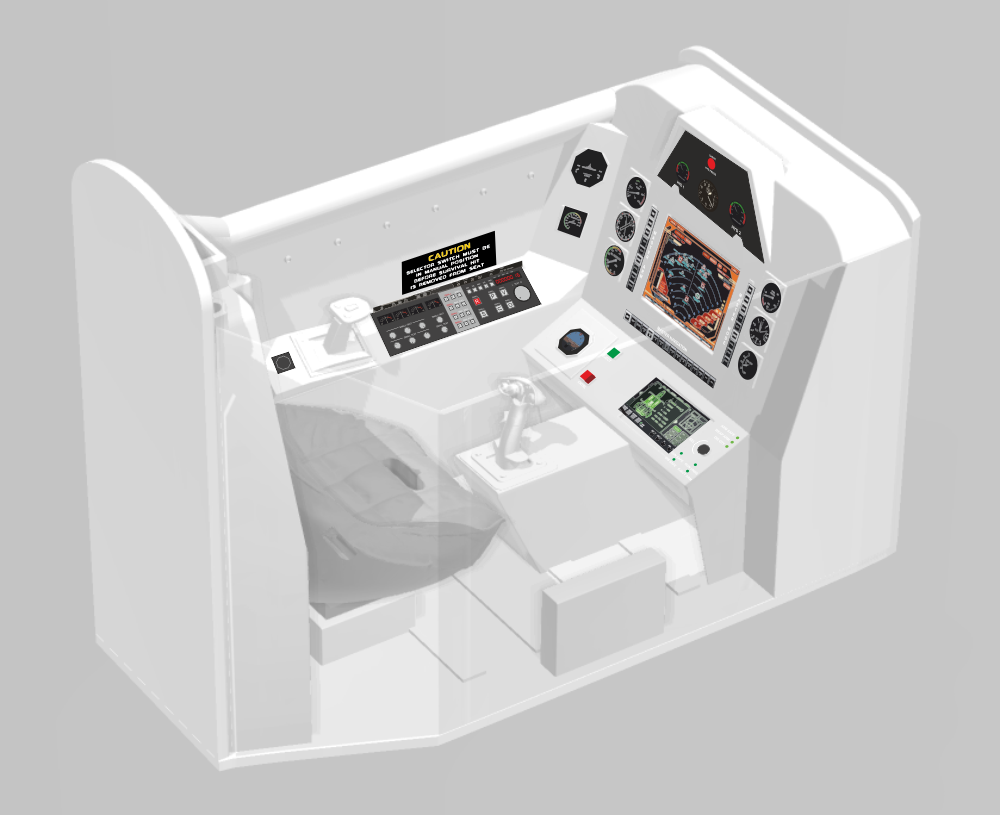
When I decided to print the original Viper by Gambody (1:32 scale) at 1:16 scale it was noticeable that the cockpit was nothing like the actual viper. Then I printed again at 1:10 scale and decided to do something about it.
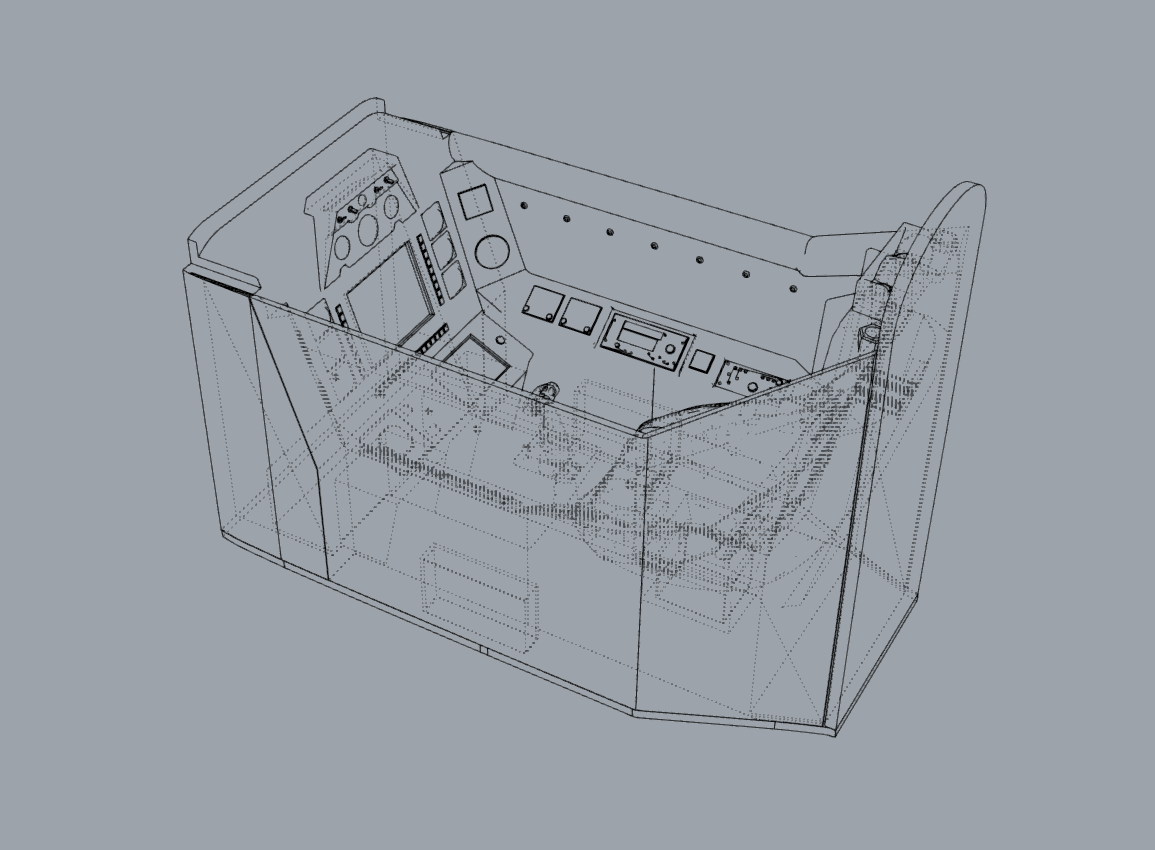
This detail pack contains a replacement set of files to more accurately represent the actual screen craft cockpit. As some of the internal dimensions inside the Gambody fuselage is a little off, some liberties had to be taken to fit the detail in but the result is certainly a great improvement on the Gambody original.
Also included is a set of vector artworks for a decal sheet for the instrumentation and signage. This is provided as a vector PDF file.
3D part files are supplied at the original 1:32 (FDM) scale but can be scaled up if you want to print a larger model. (1:16 = 200%, 1:10 = 320%)
Decals files are supplied in 1:32, 1:16 and 1:10 scale, but again these can be freely resized as they are in vector format.
PLEASE NOTE: at anything less that 1:16 scale there will not be much to see on those instruments as they are tiny. But at 1:10 scale you can actually read some text if the printer has enough resolution.
As a bonus I have included a new canopy that does not need the thick, chunky 3D printed windows. This version will allow you to fit thin sheets of transparent material. The STL for the canopy is supplied along with SVG files for the window pane cutouts. (Use a laser to cut or print out, stick and cut by hand)
Also included are the STL file for baffles to fit inside the engine exhausts and improved compressor turbines as a more realistic touch.
This kit is not recommended for scales less that 1:16 as the details will be lost and the decals barely legible. It is also recommended to resin print these parts for detail although at 1:10 scale an FDM printer is acceptable using 0.12 mm layer height.
NOTE: Does not contain actual any physical parts - you will also need the Viper 3D model from Gambody!
Other parts may become available but I only want to supply originally designed parts, not modified Gambody parts, and although I have improved other areas of this craft those improvements were made by modifying the original files so I cannot offer these at the moment. If I re-model them then they may appear here.
(Possible future items: all engine parts separate from fuselage for easy painting and better detailing, composite landing gear for maximum detail, rear panels as separate entities and with more accurate details.
Thanks to BuildsByBaz who supplied a lot of information on the Viper cockpit and instrumentation.
Hugely more screen accurate cockpit 3D parts. Partial raised details in accurate positions to represent knobs and switched to align with the decals.
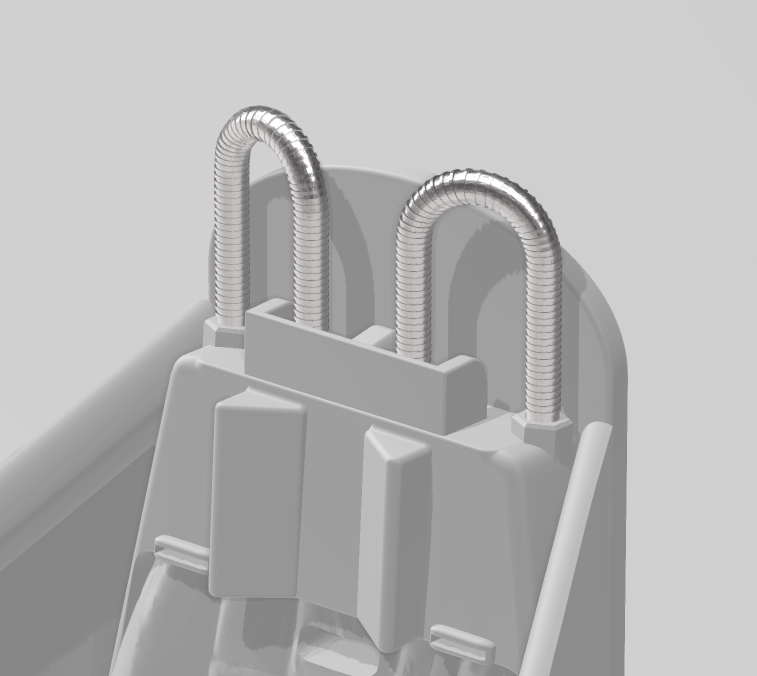
Includes smooth and ribbed pipe details behind head rest.
Set of decals for cockpit instrumentation and signage.
The most accurate decal set you can find.
Baffle plates to insert into engine exhausts.
Improved canopy that accepts thin transparent sheet material instead of thick 3D printed panels. SVG files included to help cut window panes.
Improved compressor intake turbine fans.
Future Plan - Complete set of decals for the rest of the craft.
Future Plan - Broken down landing gear components for a more detailed assembly.
Future Plan - Detailed avionics, engines and rear panels.
You will need the complete Viper model available from Gambody.

A set of 6 parts to more accurately represent the Viper cockpit.
All instrumentation is accurately modelled down to the actual seat used to create the Viper cockpit.
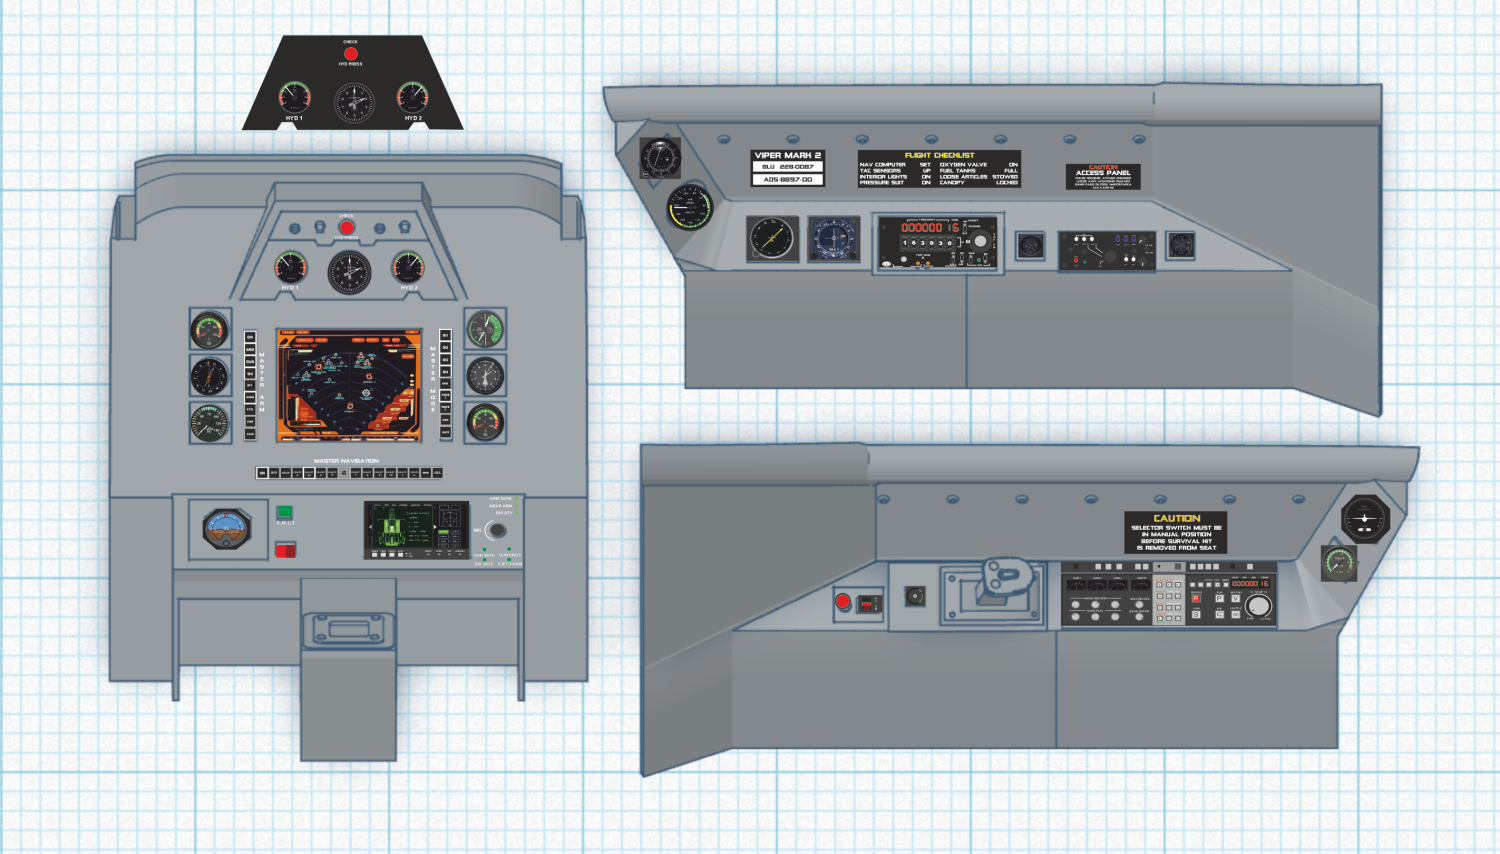
A set of instrumentation and signage decals in PDF format. Decals have been created to authentically recreate the instruments and products actually used to construct the on-screen viper. Where possible we have included the correct text labels on all instrumentation even at levels you will not see at 1: 10 scale. This is the most accurate representation of equipment and instrumentation that you are most likely to find in one place.
Be aware that these contain white elements and will require a printer capable of printing white ink/toner. You will also require white under-printing for the lighter colours to stand out on the dark coloured instrument panels and cockpit interior.
Alternatively you could use a printing service that can handle white printing.
We may be able to offer printed decals in the near future.
Just a simple detail to insert into jet exhausts.
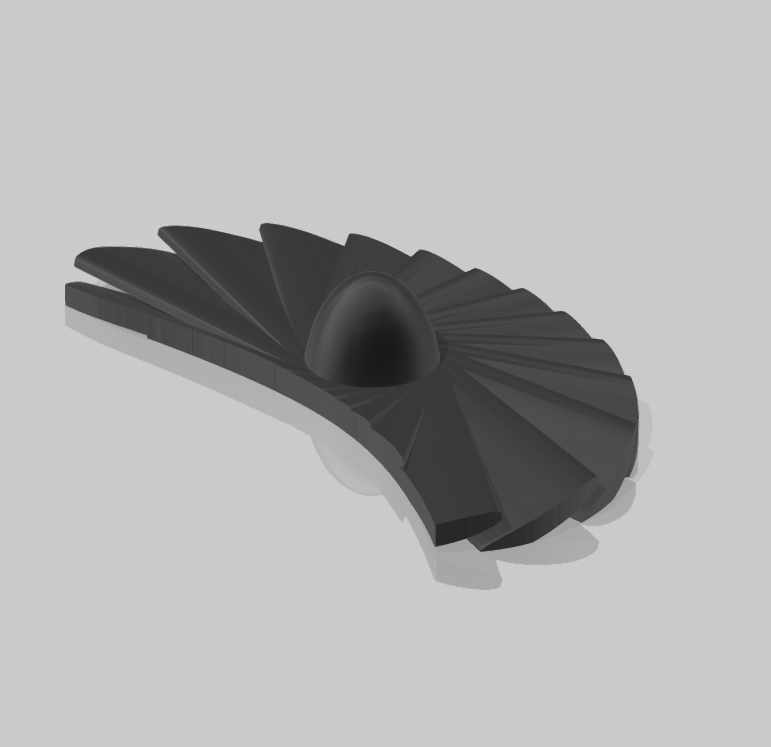
More detailed turbine fans. Noticeable on larger models.
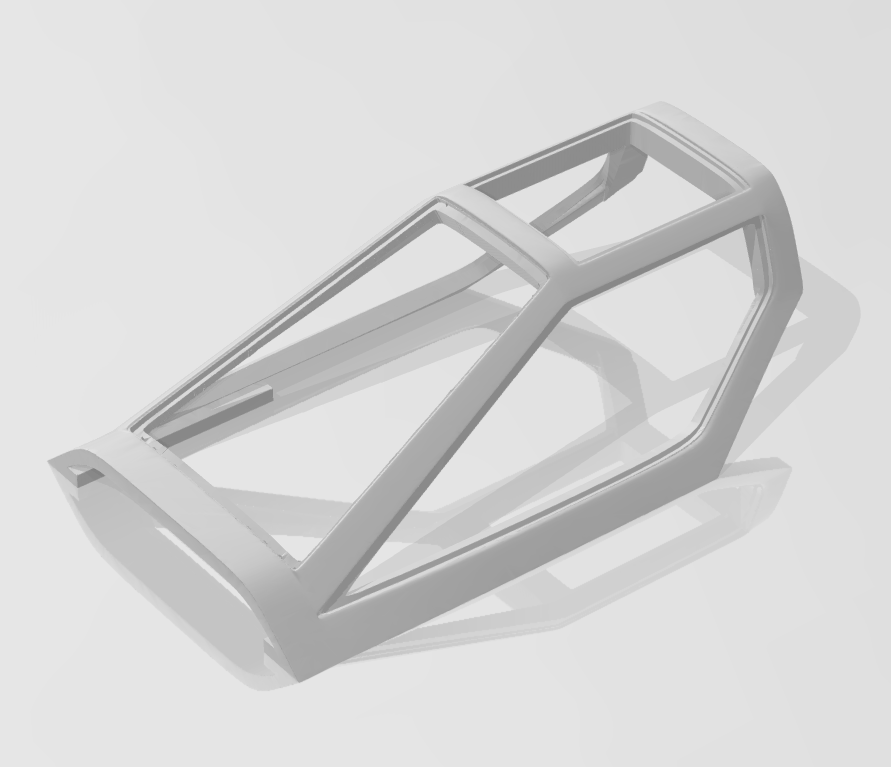
Improved canopy that accepts flat sheet material window panes rather than the chunky 3D printed ones of the original. You can now cut flat sheets of transparent material to fit as window panes.
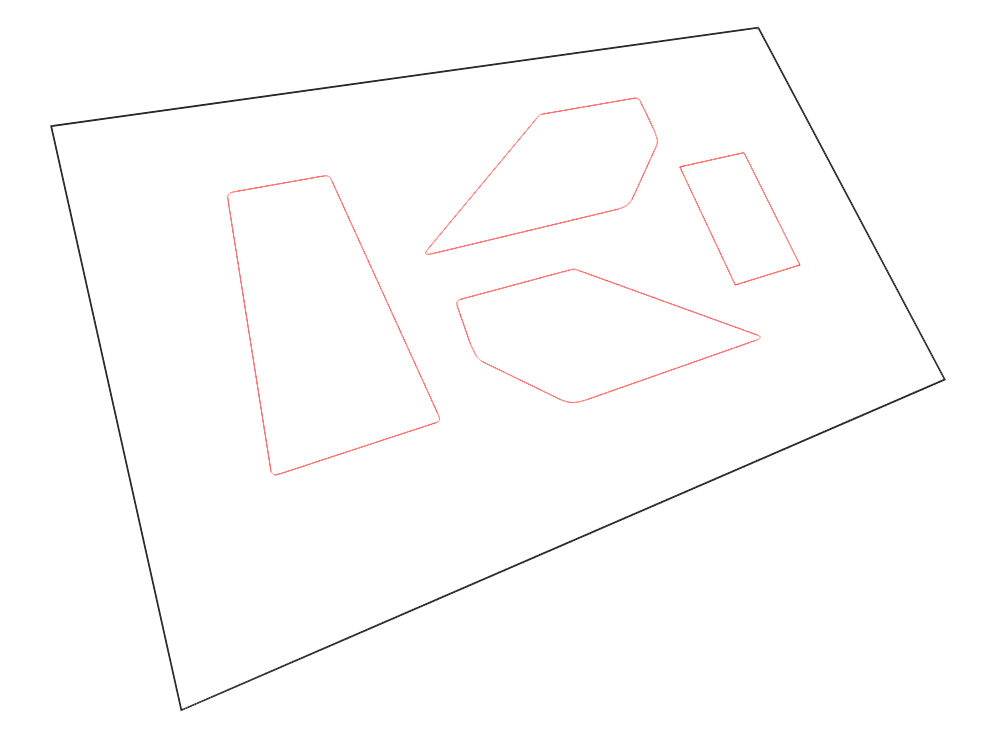
SVG files are included for flat sheet cutouts to fit the new canopy.
Either use a laser cutter or print, stick and trim to create your windows.